Example: Journal Entry
This example builds a Journal Entry workbook from scratch, covering the header fields, the transaction grid, and the button that pushes the entry to Acumatica. A Journal Entry writeback uses a header table for the fields shared by every transaction line, the financial period, transaction date, description, ledger, branch, and currency, and a transaction grid for the individual debit and credit lines. The Writeback Wizard maps each of these cells to the corresponding Journal Transaction fields in Acumatica and generates the NECWRITEBACK formula that creates the entry.
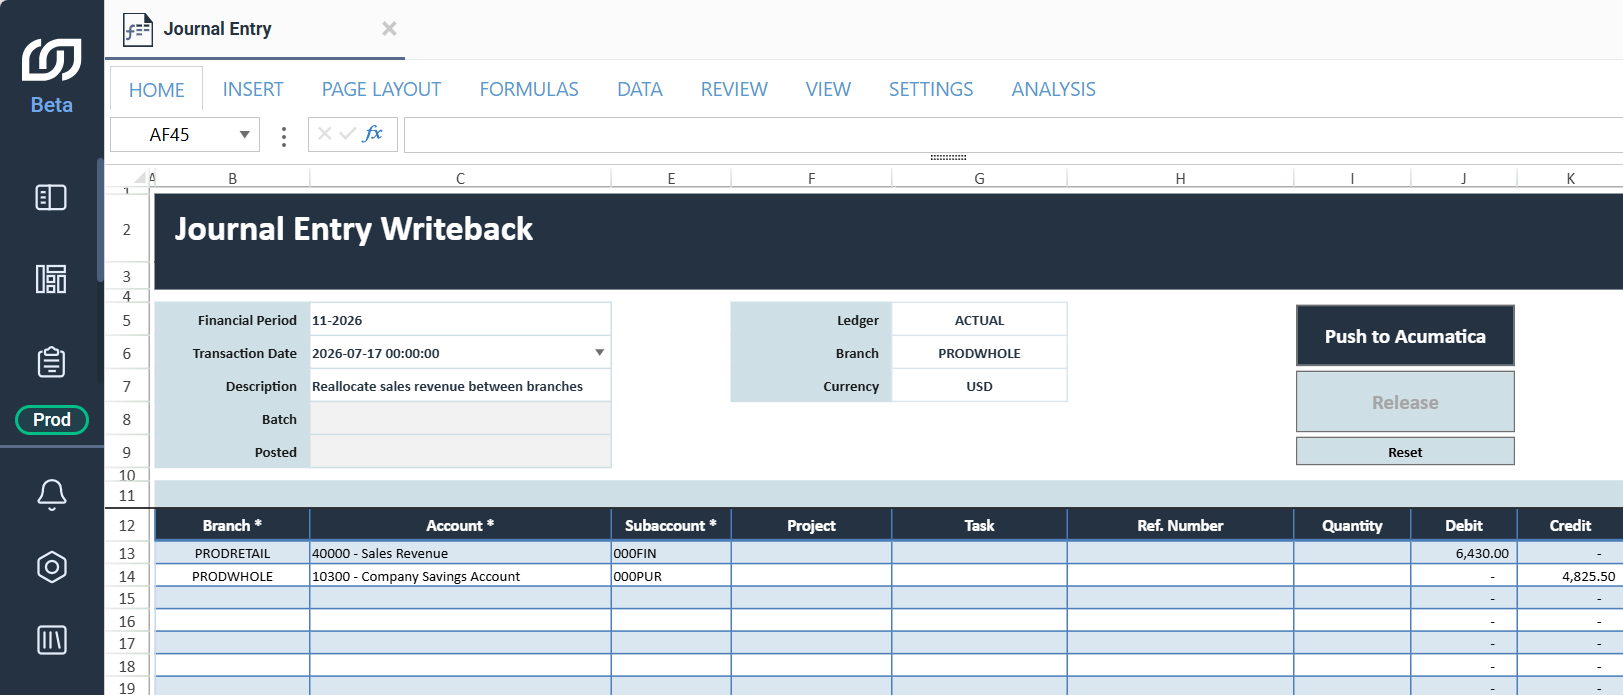
The finished template includes three buttons: one that pushes the journal entry to Acumatica, one that releases it, and one that resets the template for the next entry.
To follow along, you need a data source connected to Acumatica with the endpoints configured, and permission to create writebacks in SEI.
Create the journal entry template
- Select Workbooks in the navigation panel.
- Right click and select New Workbook.
- Name the workbook
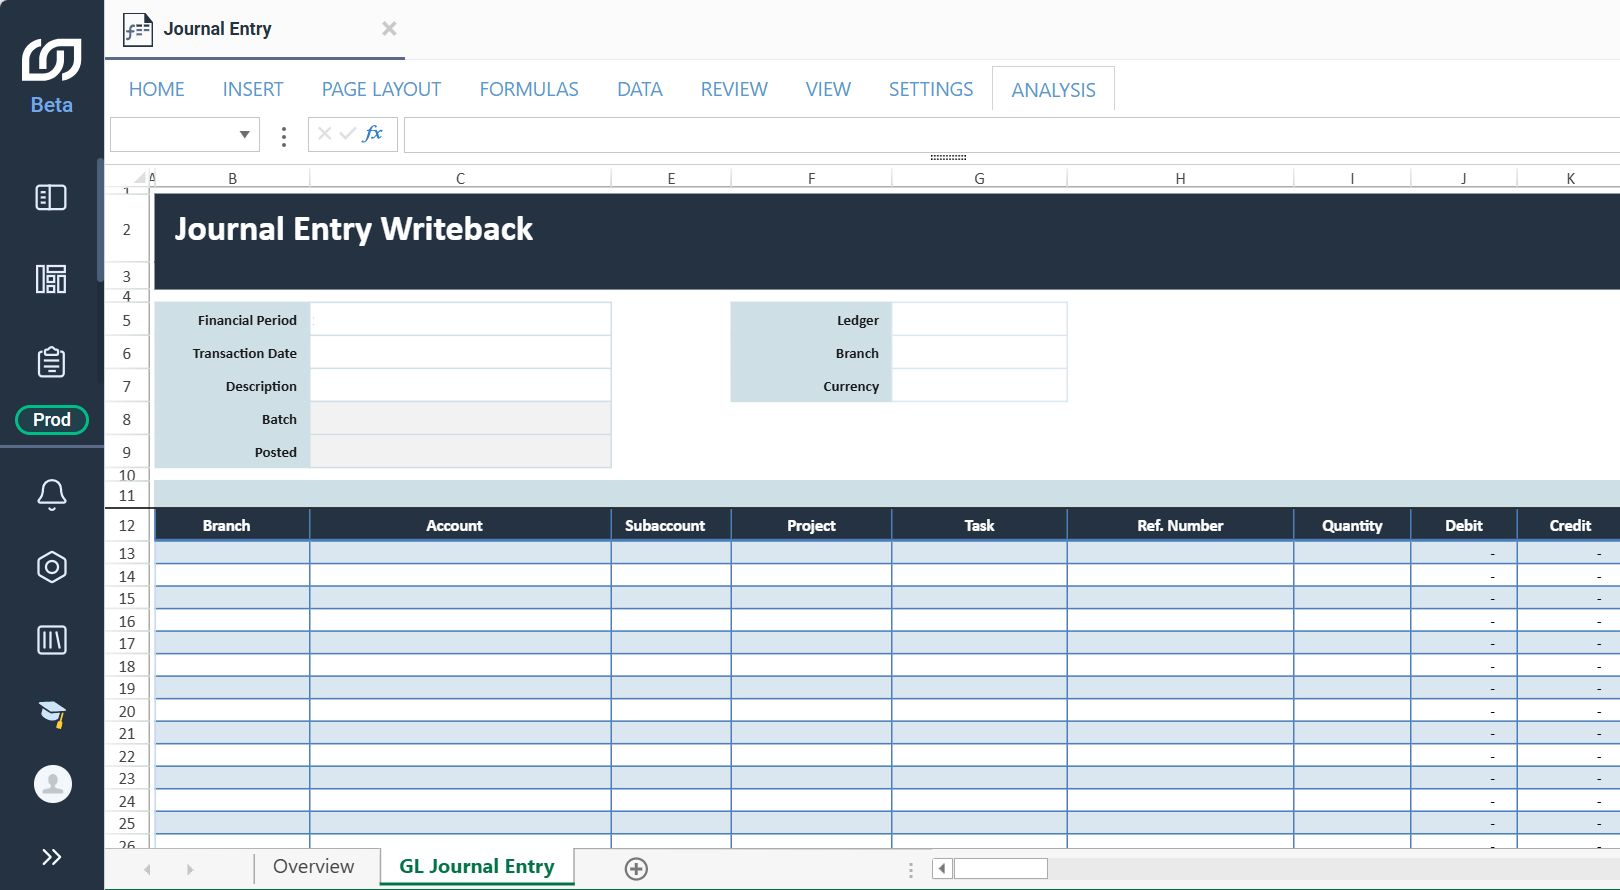
Journal Entryand click Save. - Create a five row, two column table for the fields shared by every transaction line:
- Financial Period (
B5) - Transaction Date (
B6) - Description (
B7) - Batch (
B8) - Posted (
B9)
- Financial Period (
- Next to it, create a three row, two column table for the ledger fields:
- Ledger (
F5) - Branch (
F6) - Currency (
F7)
- Ledger (
- Create the transaction grid from
B12toJ12with these headers, in order: Branch, Account, Sub Account, Project, Task, Ref. Number, Quantity, Debit, Credit. - Apply formatting to the tables and grid, such as fill colors, borders, or header styles.
- Click Save on the toolbar.
Select the fields for the writeback
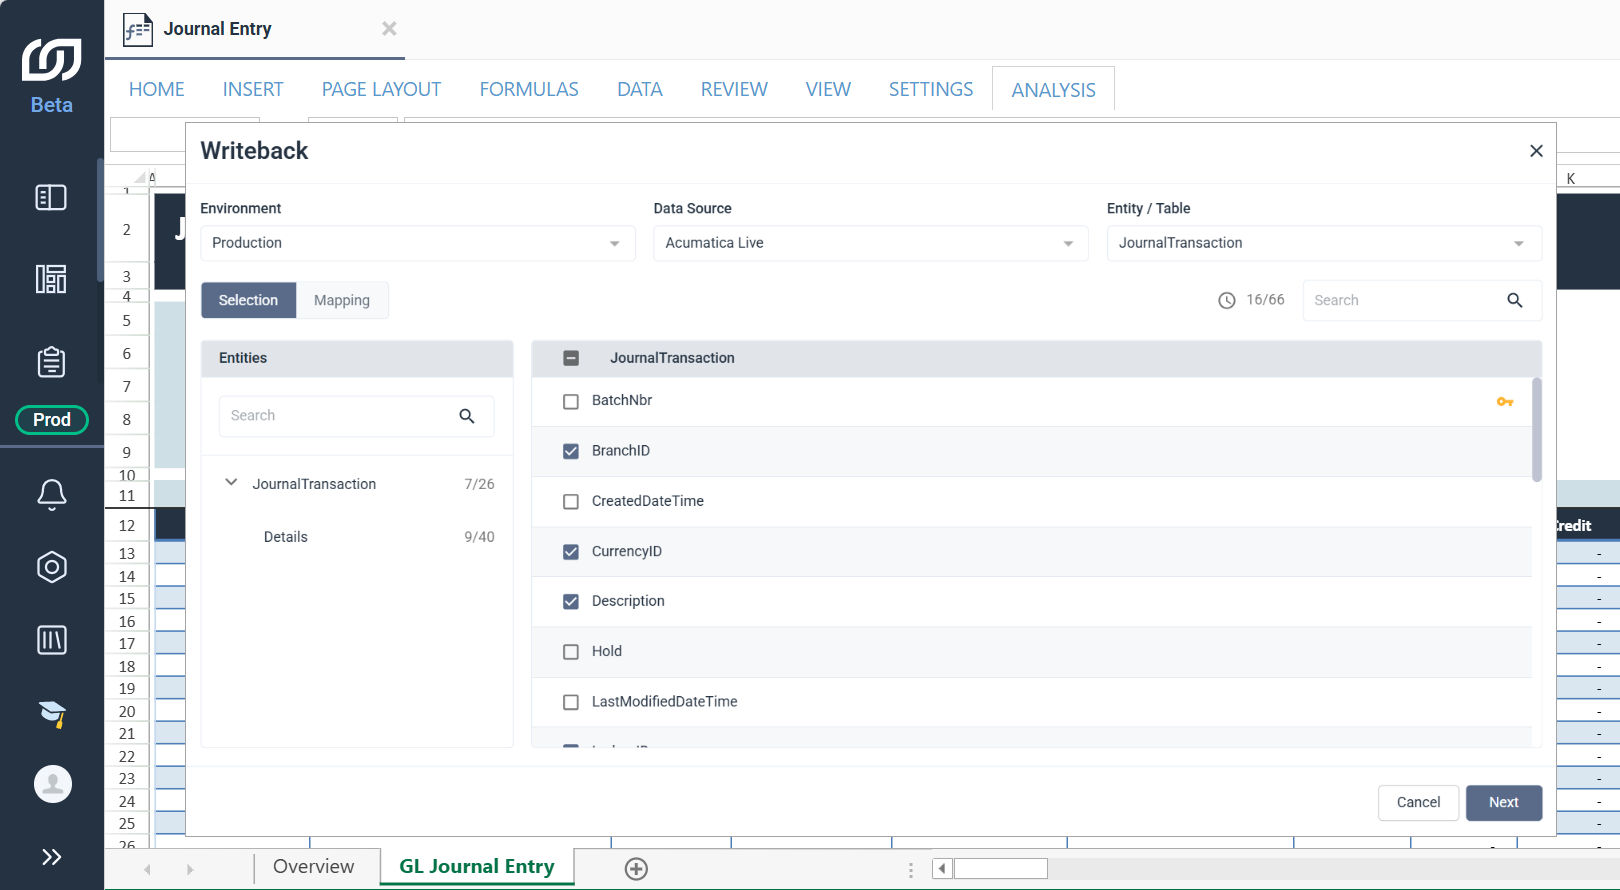
- Select the Analysis tab, then click WRITEBACK Wizard.
- Select the environment and the Acumatica data source you want to connect to.
- Select the Journal Transaction entity.
- Under Journal Transaction, select these header fields: BranchID, CurrencyID, Description, LedgerID, Module, PostPeriod, and TransactionDate.
- Expand Journal Transaction and select the Details table.
- Select these detail fields: Account, CreditAmount, DebitAmount, Project, ProjectTask, Qty, ReferenceNbr, and Subaccount.
- Click Next.
Map each field to the table
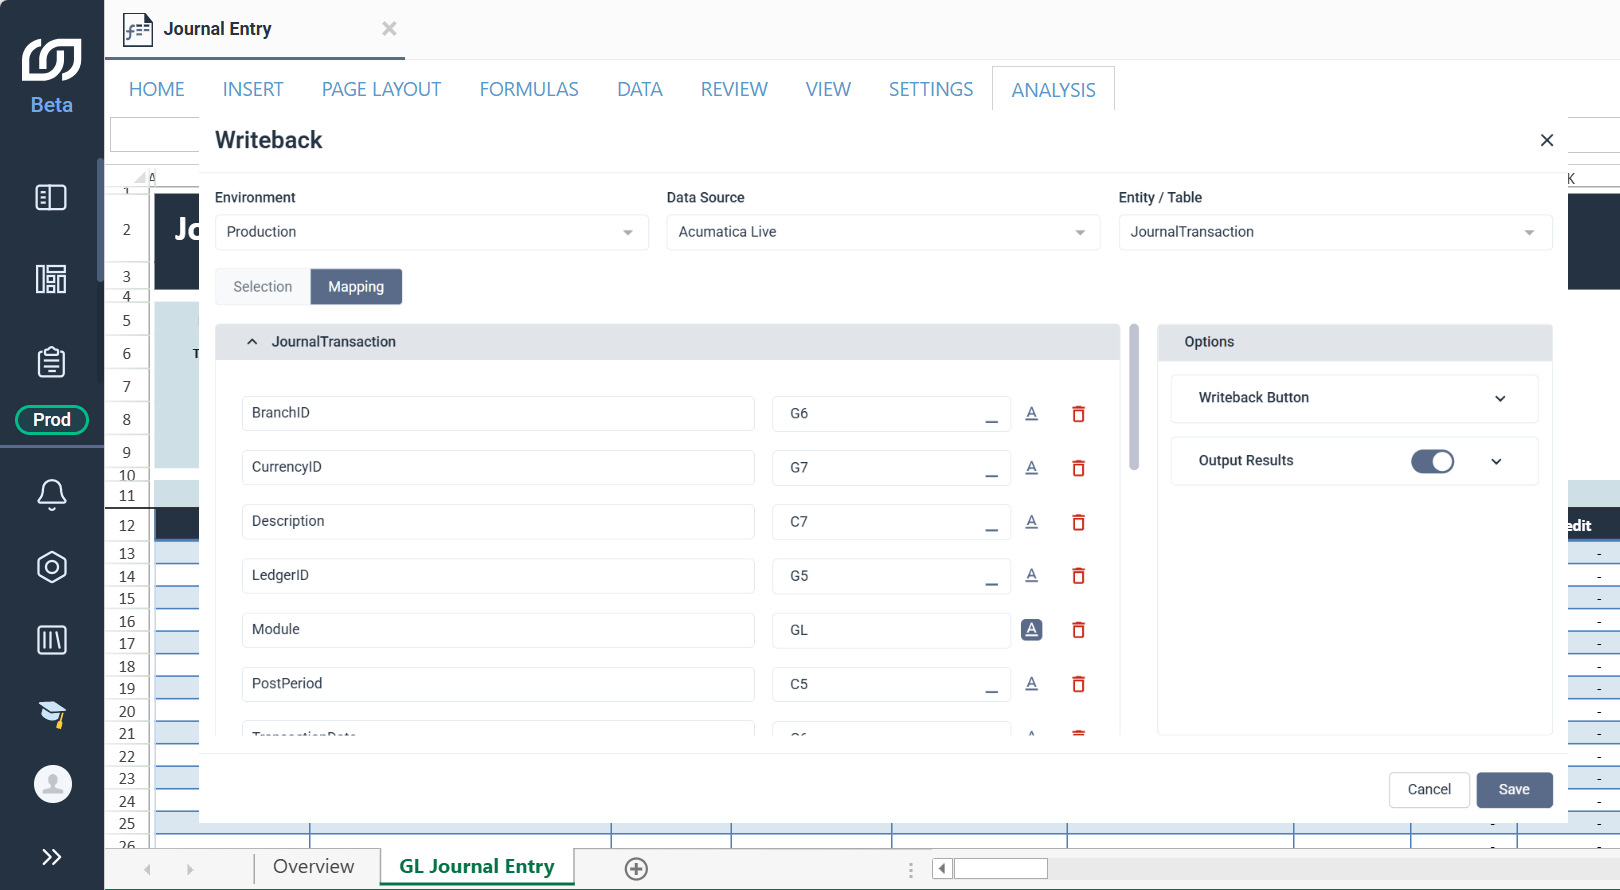
- Under Journal Transaction, map each field to its cell. Click the cell directly in the workbook, or type the reference:
- BranchID:
G6 - CurrencyID:
G7 - Description:
C7 - LedgerID:
G5 - PostPeriod:
C5 - TransactionDate:
C6
- BranchID:
- For Module, enter the literal value
GLinstead of a cell reference. - Under Details, select Existing table, then select GLEntry from the dropdown.
- Map each field to its column:
- CreditAmount: Credit
- DebitAmount: Debit
- Project: Project
- ProjectTask: Task
- Subaccount: Sub Account
- Qty: Quantity
- Account: Account
- ReferenceNbr: Ref. Number
Create the writeback button
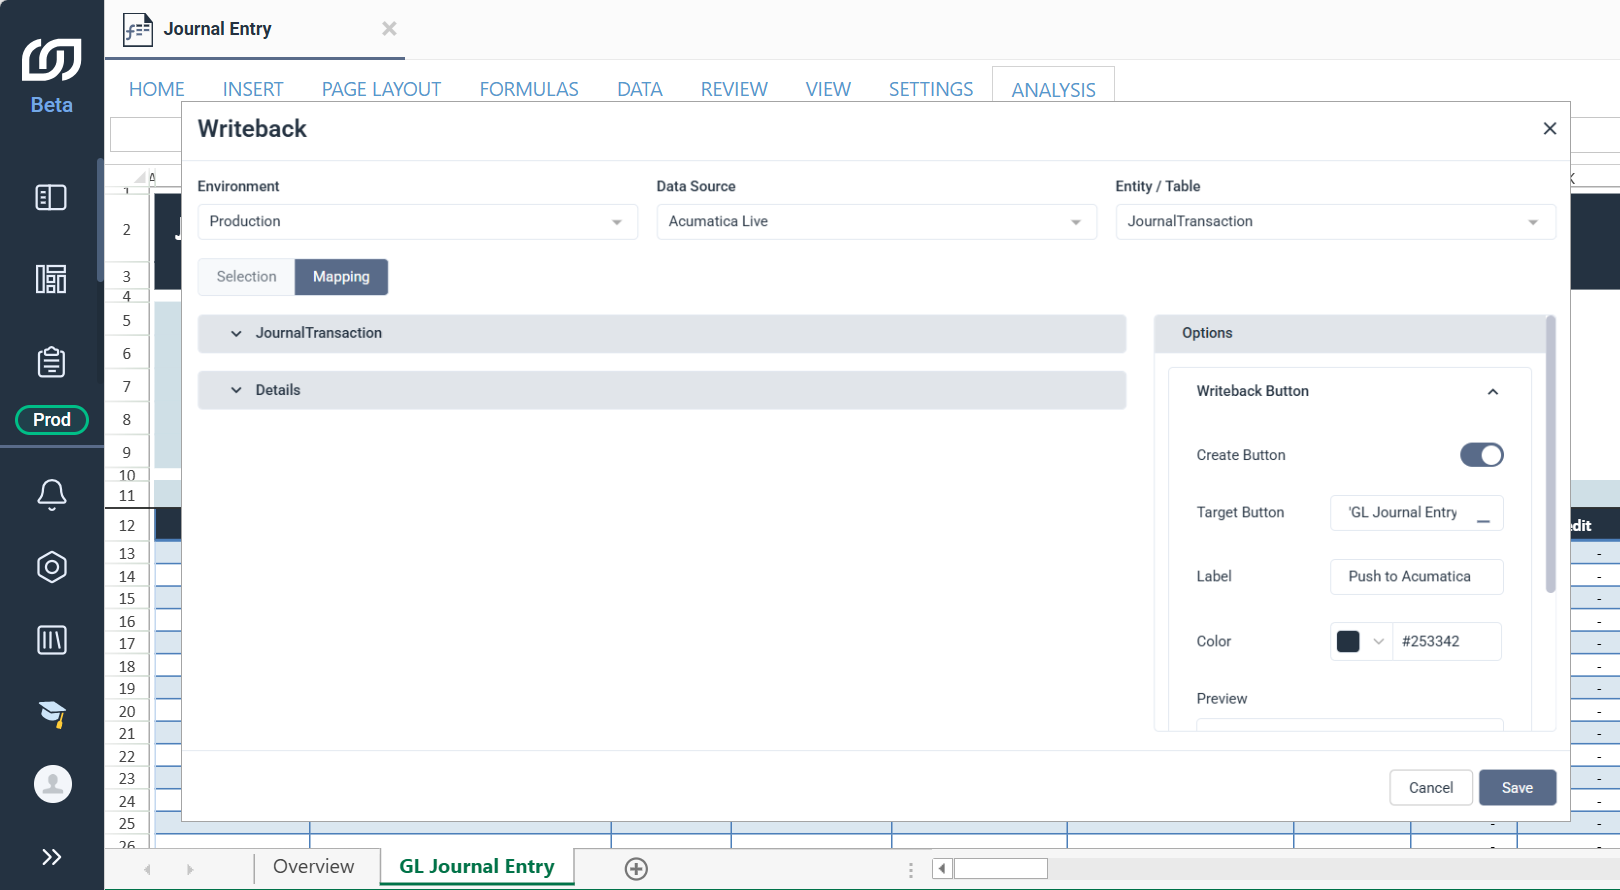
- Under Options, expand Writeback Button.
- Toggle Create Button on.
- In Target Button, enter or select the cell where the button will appear, for example
I5. - In Label, enter
Push to Acumatica. - Select a color for the button, for example
#253342. - Review the Preview to confirm the button's appearance.
Enable output results
- Under Options, expand Output Results and toggle it on.
- In Cell Reference, enter or select the cell where the result will appear, for example
C8. - Click Save.
Create the release button
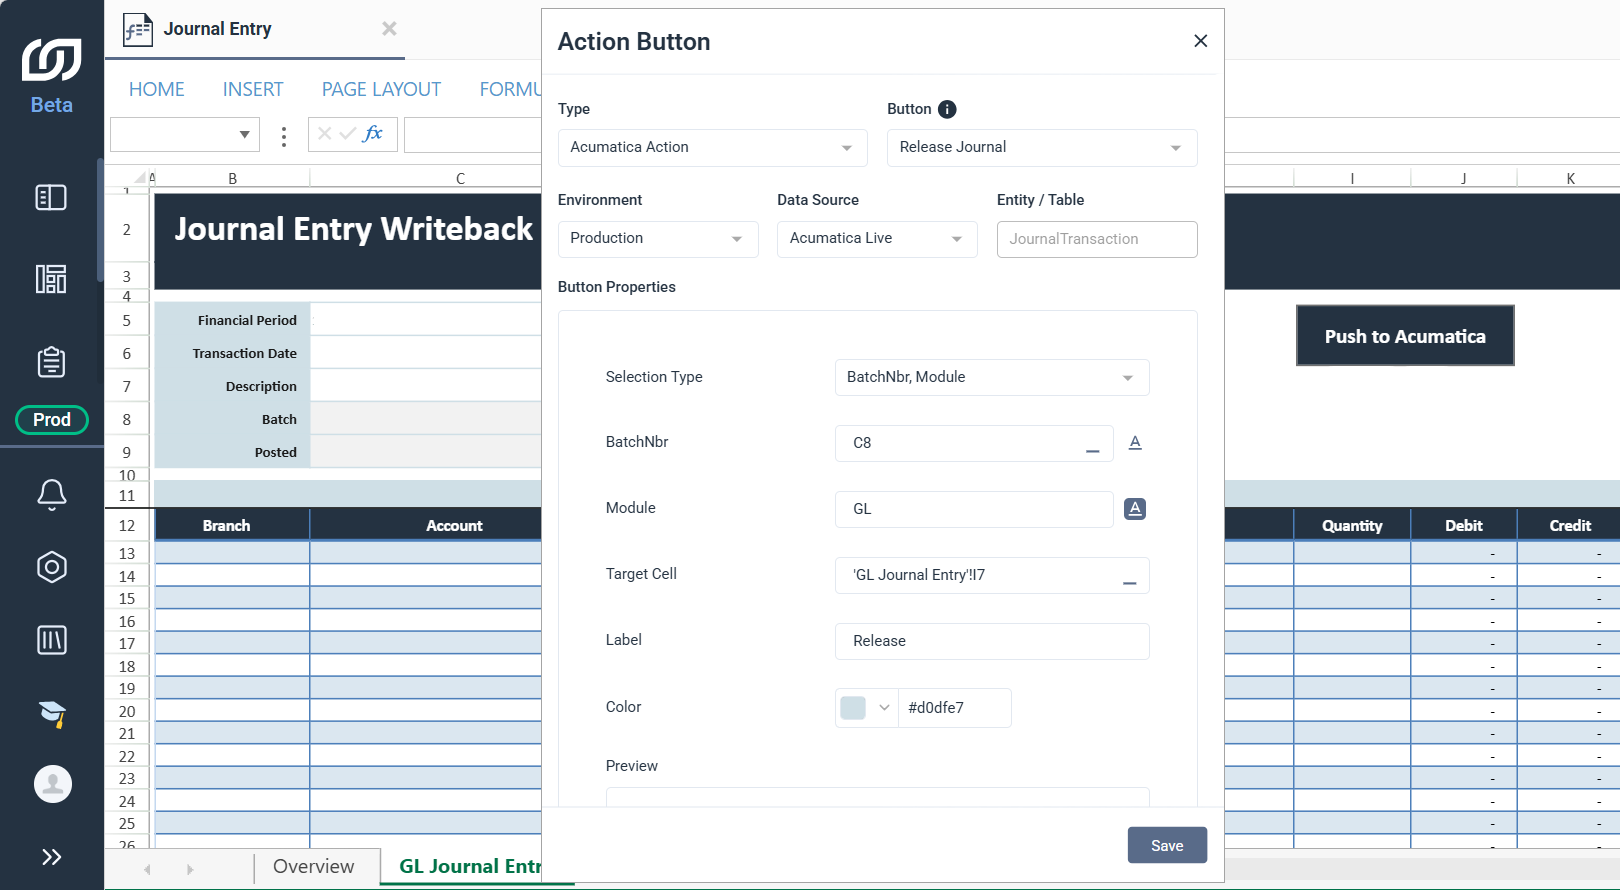
- Select the Analysis tab, then click Action Button Wizard.
- Under Type, select Acumatica Action.
- Under Button, select Release Journal.
- Select the same environment and data source used for the writeback button.
- In Selection Type, select BatchNbr, Module.
- In BatchNbr, enter or select
B8. - In Module, enter
GL. - In Target Cell, enter or select
I7. - In Label, enter
Release. - Select a color for the button, for example
#D0DFE7. - Click Save.
Create the reset button
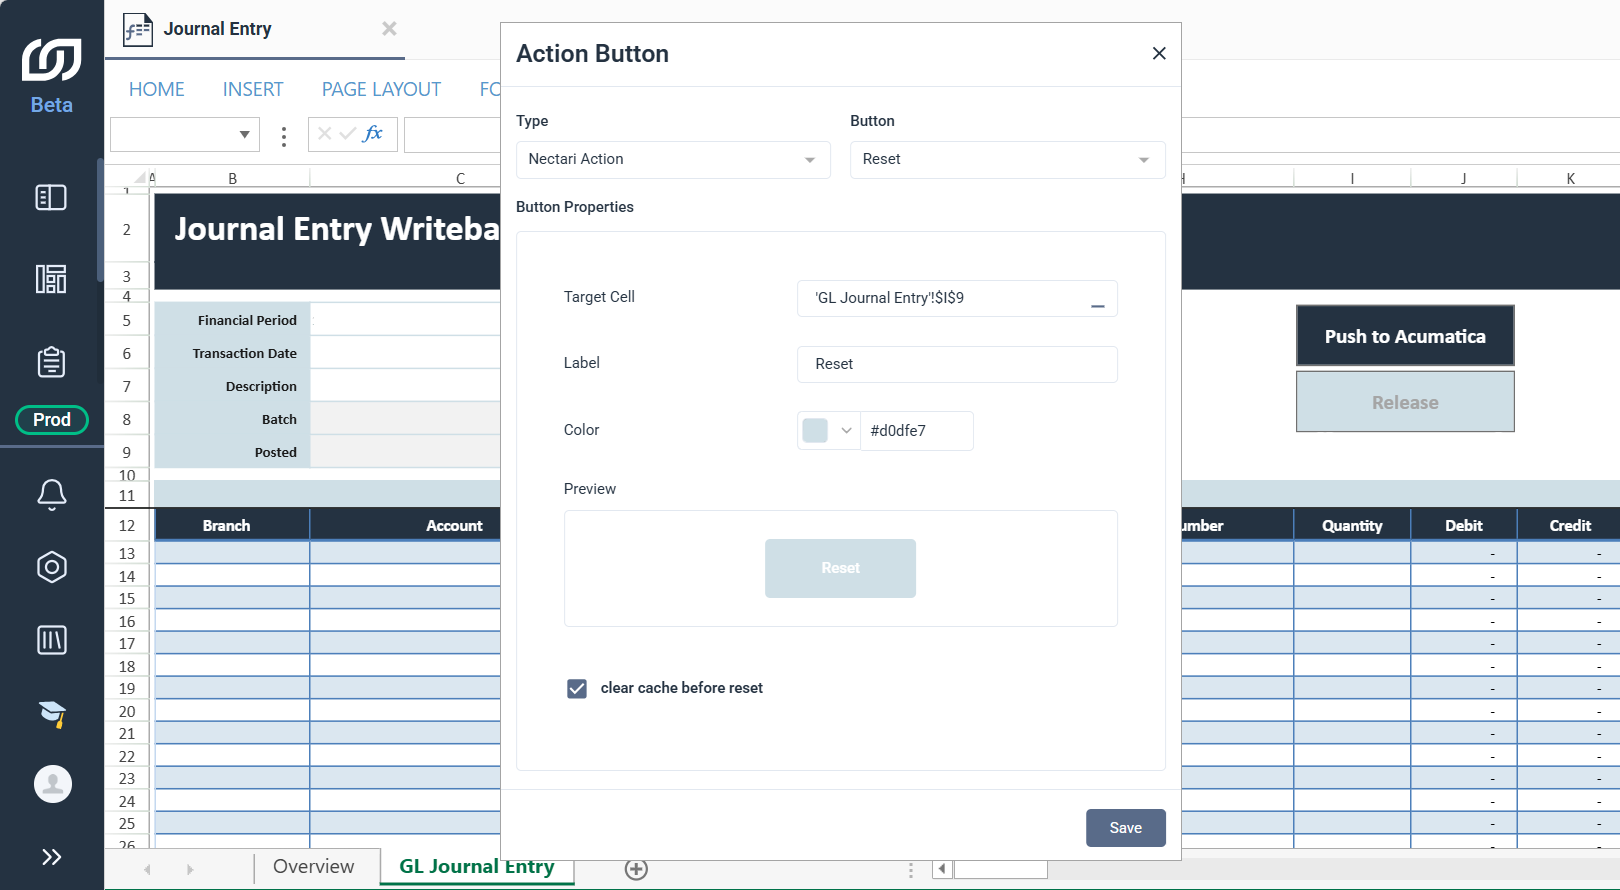
- Select the Analysis tab, then click Action Button Wizard.
- Under Type, select Nectari Action.
- Under Button, select Reset.
- In Target Cell, enter or select
I9. - In Label, enter
Reset. - Select a color for the button, for example
#D0DFE7. - Select Clear cache before release.
- Click Save.
Enter transaction lines
- Enter
Reallocate sales revenue between branchesin Description. - In the first row, enter PRODRETAIL for Branch, 40000 - Sales Revenue for Account, and 000FIN for Sub Account.
- In Debit, enter
6,430.00. - In the second row, enter PRODWHOLE for Branch, 10300 - Company Savings Account for Account, and 000PUR for Sub Account.
- In Credit, enter
4,825.50.
Push and release
- Click Push to Acumatica to create the journal entry in Acumatica.
- Click Release to release the entry.
- Click Reset to clear the template and start over.