Load by Partition
Load by Partition splits a table extraction into smaller batches called partitions, instead of loading everything at once. Partitions are defined on date-based or number-based fields. Depending on the configuration, you may need to provide a start value, an end value, and a partition step. This approach reduces the risk of timeouts, improves performance on large tables, and lets interrupted loads resume from the failed partition instead of starting over.
This feature is available for Synchronization and Consolidation extractions. It is currently in Beta for all connector types except Sage Intacct and Custom API.
When to load by partition
- Improve performance by splitting large table extractions into smaller chunks that are faster to process.
- Increase reliability by resuming from the failed partition instead of restarting the whole load when an error occurs.
- Manage large datasets without locking the entire source or destination during extraction.
Default vs. partition load
| Load type | What happens |
|---|---|
| Default | Loads the entire table in a single operation. If an error occurs before completion, the load stops and must restart from the beginning. No progress is saved. |
| By partition | Loads the table in sequential batches based on a date or number field. If an error occurs during a partition, all previously completed partitions are kept. Only the failed partition needs to be reloaded on the next run. |
Configure a load by partition
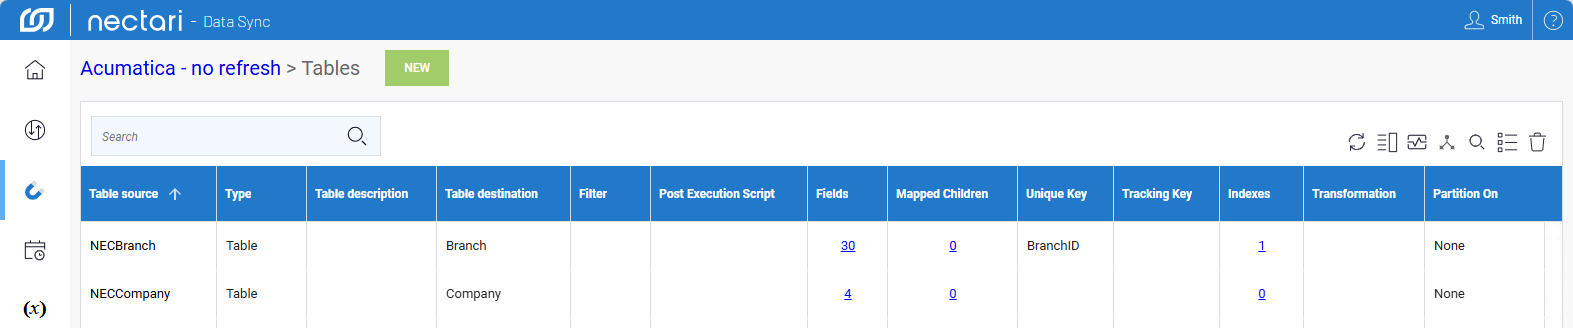
- From the welcome screen or left navigation pane, select Extractions.
- Select an extraction from the list and click the link under the Tables column.
- Select the table you want to configure.
- Click the Partition Settings icon in the upper‑right corner.
- Select Use partition settings.
- From the Parition On dropdown, select Date or Integer.
- From the Field dropdown, select the source field to partition on.
- Fill in the fields for the partition type.
- Click Confirm.
Partition type
- Integer-based
- Date-based
Integer-based
| Field | What to enter |
|---|---|
| Minimum Value | Lower bound for the extraction. If left empty, DataSync starts from the lowest value in the field. |
| Maximum Value | Upper bound for the extraction. If left empty, DataSync goes up to the highest value in the field. |
| Range | Step size for each partition. Default is 2000, meaning each partition covers 2000 values at a time. |
A Range of 2000 with a Minimum Value of 0 and a Maximum Value of 4000 generates two partitions: values 0 to 1999 in the first partition, and 2000 to 4000 in the second.
Choose the best numeric field
Integer-based partitions split by a numeric field, typically a record ID or a sequence number. Each partition covers a range of values defined by the Range setting. The more unique the field values, the smaller and faster each partition is to process. A primary key or unique identifier works best since each value corresponds to exactly one row.
Date-based
| Field | What to enter |
|---|---|
| Start Date | Start date for the first partition, selected from the date picker. Dates are in UTC. |
| Day Range | Number of days each partition covers, between 1 and 30. For example, 7 creates partitions of 7 days each. |
Avoid fields that may contain future dates
Avoid fields that can contain future dates, such as posting, entry, or accounting dates. If the initial load only pulls data up to today, future-dated records are excluded. If incremental loads rely on Last Modified, those records may never be picked up unless they are edited later. Use a stable field like WhenCreated instead.
To validate the partition settings, run Validate and Build with Only add missing tables/fields/indexes enabled.
Self-healing
Extractions that run for a long time can fail partway through due to transient errors such as network interruptions, timeouts, or connectivity issues. When one of these errors occurs, the extraction normally restarts from the beginning. If you configure a checkpoint key on a field in your extraction, DataSync tracks the last successfully inserted row. When an error occurs, it picks up from that point automatically instead of starting over.
It does not guarantee that an extraction will always complete. If DataSync hits the same error five times in a row on the same checkpoint value, it stops the extraction and marks it as non-recoverable. This prevents the extraction from looping forever when the issue is not transient.
Self-healing is currently available for Synchronization extractions using the following source connections: Sage Intacct (non-legacy API) and SQL Server.
When to configure self-healing
- Large data volumes where restarting from scratch after a failure would be costly in time and resources.
- Unstable or intermittent sources prone to transient errors or scheduled during maintenance windows.
- Uneven partition distribution where some partitions contain significantly more data than others and are prone to timing out.
How to choose a checkpoint key
The checkpoint key must be a synced whole-number field with matching source and destination types. Choosing the right field matters because if too many rows share the same value, DataSync may retry that value too many times and stop the extraction. A good checkpoint key field:
- Increases over time.
- Does not change after the row is created.
- Is filled in for every row.
- Is a primary or unique key in the source.
- Is not a calculation field.
They serve different purposes and can both be active on the same extraction at the same time. The Track Key is used in incremental extractions to fetch only records that changed since the last run. The Checkpoint Key determines where to resume if an error occurs mid-extraction.
Configure a checkpoint key
- Select a synchronization extraction, then click the Tables link.
- Choose a table, then click the Fields link.
- Check Checkpoint Key for the field you want to use.
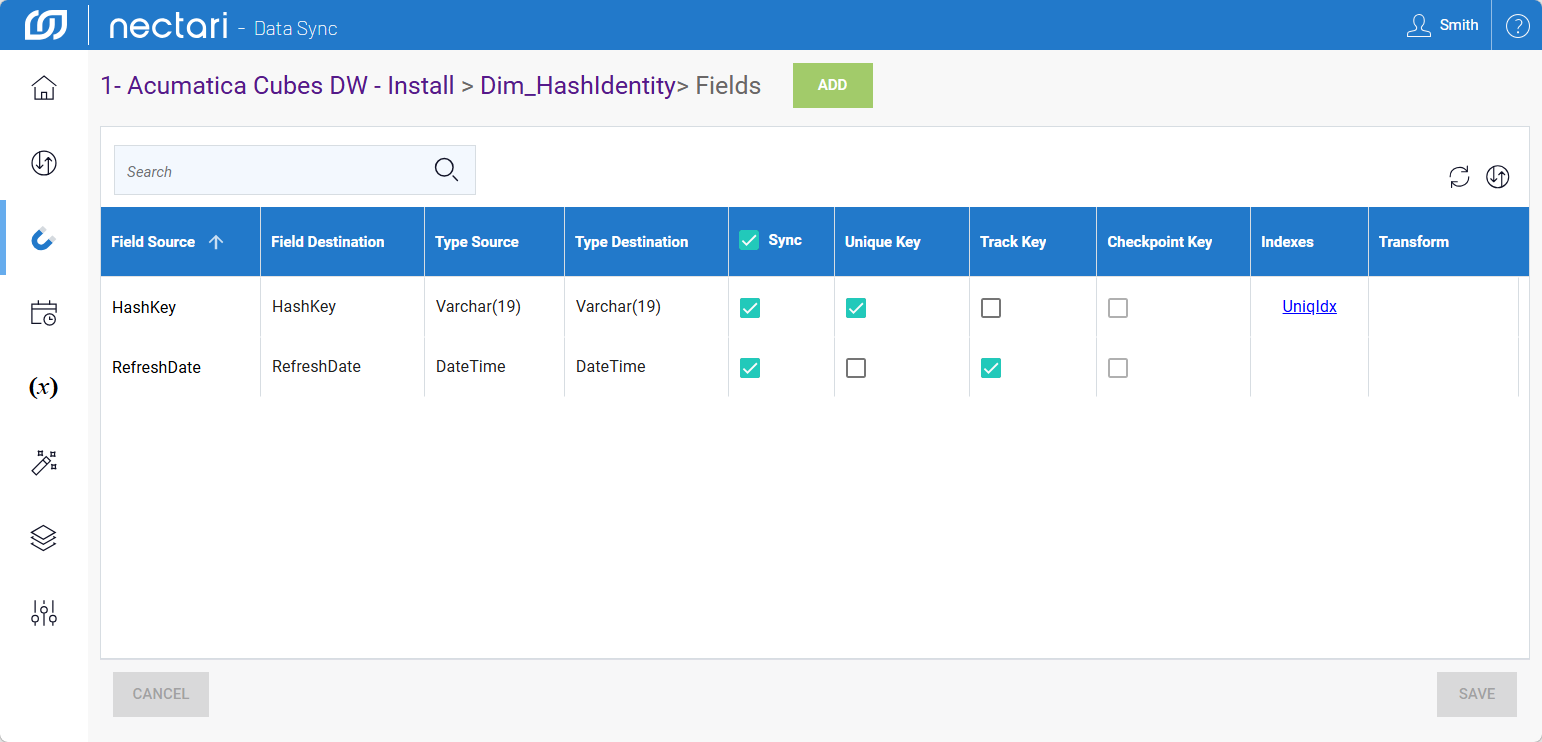
This example shows how the checkpoint key tracks progress and how DataSync uses it to resume after a failure without reprocessing already inserted rows.
Example
- The extraction starts with no checkpoint value. All records need to be processed.
- The first batch completes and checkpoint key updates to 1000.
- The second batch completes and checkpoint key updates to 2000.
- An error occurs during the third batch. The checkpoint key stays at 2000.
- DataSync resumes from 2000. Records below that value are not reprocessed.
The checkpoint key updates after each batch, not after each row. If a batch fails partway through, DataSync resumes from the last successfully completed batch.
View load status
- In DataSync, select a table with a partition by load. Look for the Partition checkmark.
- Click the Table Status icon in the upper-right corner.
- Review the status.
- (Optional) Enable Override default loading behavior to choose a different way to reload data (only with date-based paritions).
- Close to complete.
| Status | What it means |
|---|---|
| Never loaded | Never been loaded. Running a Truncate and Load or Incremental Load will process all data, in partitions if enabled. |
| Done successfully | All partitions completed without errors. |
| Error | An error occurred during the load. With partitioning enabled, completed partitions are kept and the process resumes from the failed partition on the next run. Without partitioning, no data is loaded. |
| Aborted | Stopped manually. Data may be partially loaded. The remaining data loads when the extraction runs again. |
Reload data
- Keep all loaded partitions and resume loading from: enter a date to resume loading. The date must be on or after the partition start date and cannot be in the future.
- Force reload all data from the initial partition start date: reloads all partitions from the start date, even if already loaded. Only available when the load failed or was stopped.