Setting up Optional Fields
Optional Field ETL
Optional field ETL refers to a logic that improves analysis of optional fields and lets users create custom data models that are perfectly tailored to their own specific needs. In the past, all optional fields were considered strings which sometimes made analysis impossible without performing additional steps (e.g., adding aggregations to measures). It also lengthened the data model creation process, since joins had to be granted access to optional fields.
However, with the optional field ETL, Sage 300 uses the data type that was defined by the user in their ERP when creating tables and views. Users can also use the feature to pivot optional field tables to make all of their data accessible from one object.
If you are using DataSync, please make sure that your primary keys are well defined. If no changes were made, the application will add your primary keys by default.
The optional field ETL uses your primary keys to determine which fields are required for Joins on fact tables. If no primary key can be found, it will use your Clustered Index instead.
To perform an optional field ETL operation:
-
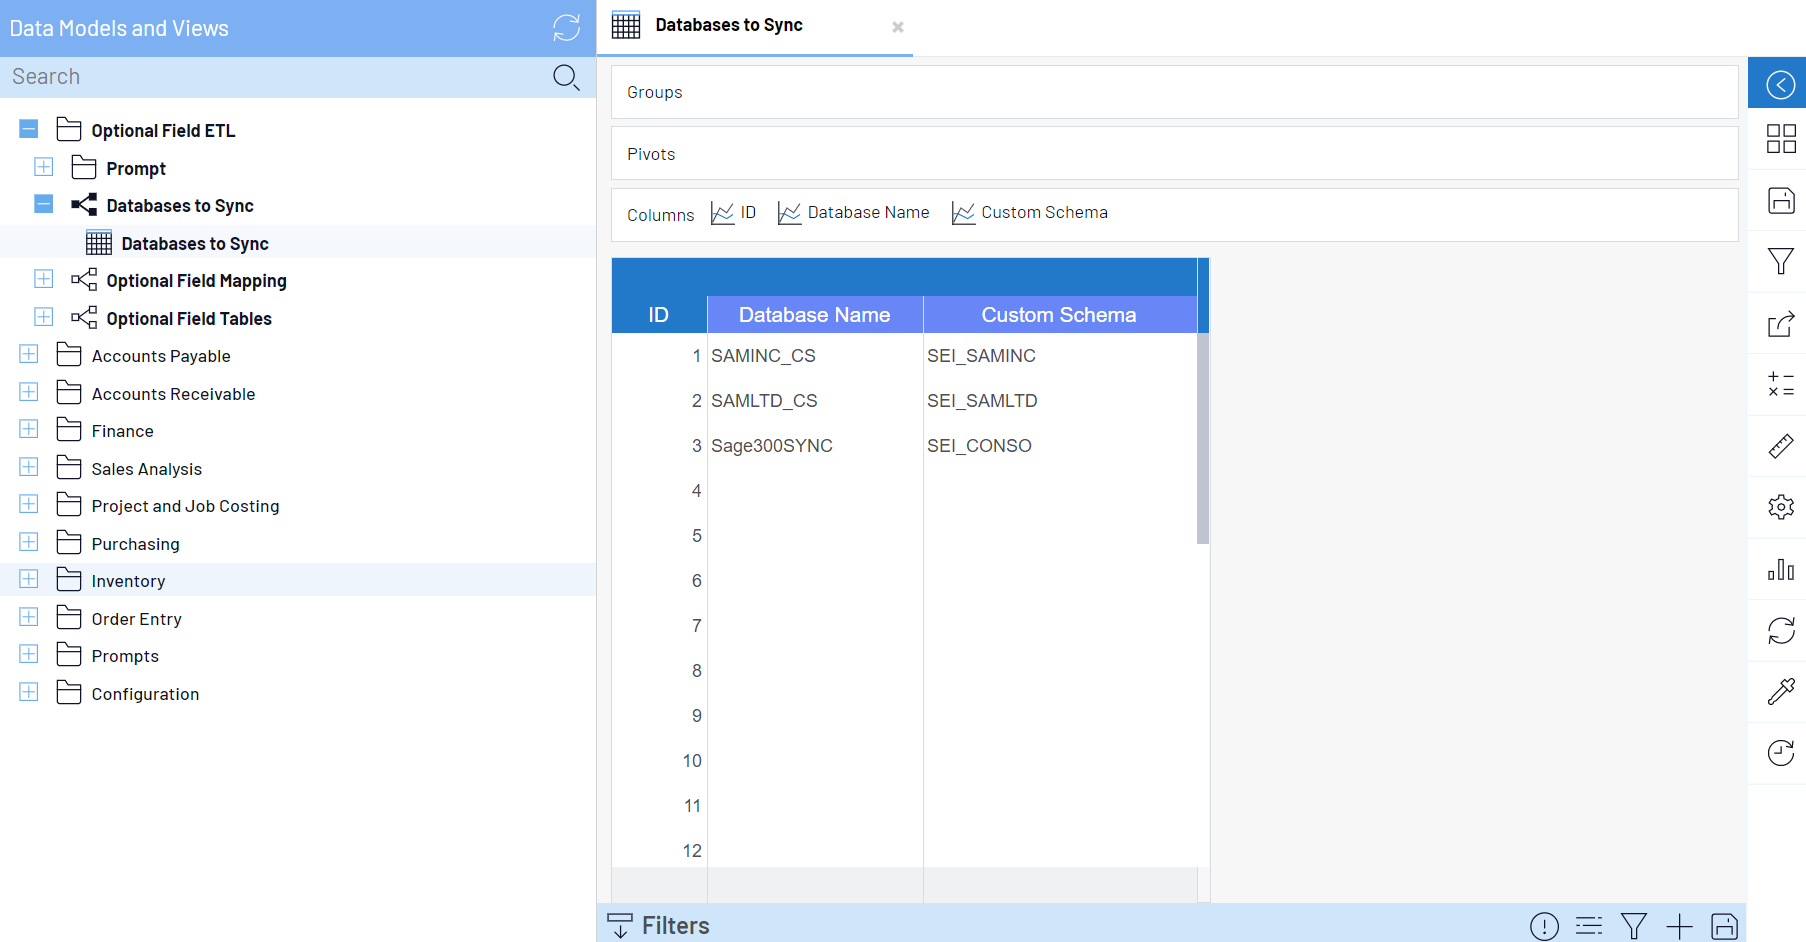
Expand Databases to Sync under Optional Field ETL in the Data Models and Views tab and open the worksheet inside of it (also called Databases to Sync). Add all databases and custom schemas from all of your environments to the worksheet. Doing so will ensure that your ETL object has the same definition across all your environments and will prevent potential data model issues when changing environments.

-
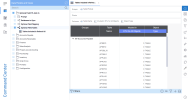
Right-click Optional Field Tables under Optional Field ETL and select View Info Page.
-
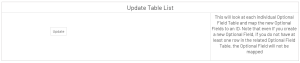
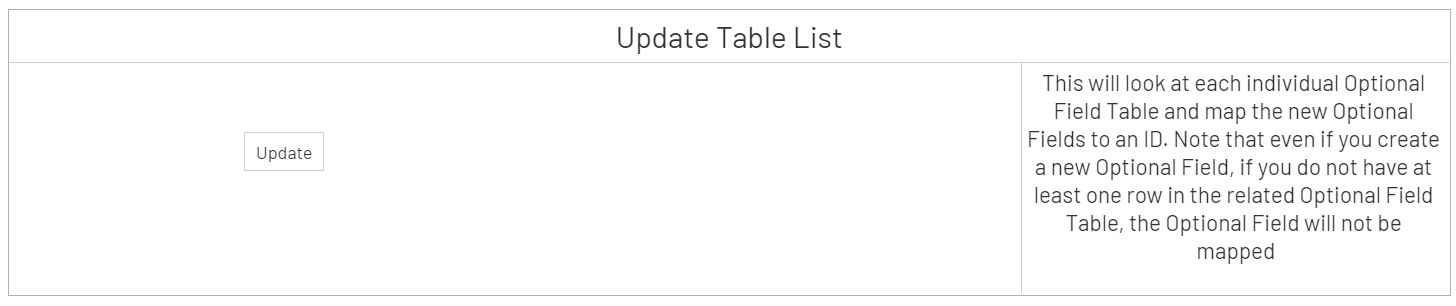
Run the Update Table List info page to scan through your -O tables (e.g., ARCUSO for Customer Optional Fields) and retrieve any optional fields contained therein. The info page will refer to your CSOPTH table for the new data type value.
 Note
NoteIf you previously consolidated multiple databases and the same optional field exists in more than one database, the Update Table List info page will retrieve the most recent definition based on audit date and time.
-
Open the Tables included in Refresh All worksheet under Optional Field Tables.
-
This worksheet contains all optional field tables and allows you to choose whether the ETL will produce a view or a table.
-
Tables allow for faster query operations but do not update in real-time (i.e., orders will not appear in your optional fields until you perform a load).
-
Views update in real-time without having to load but have slower query operations.
-
-
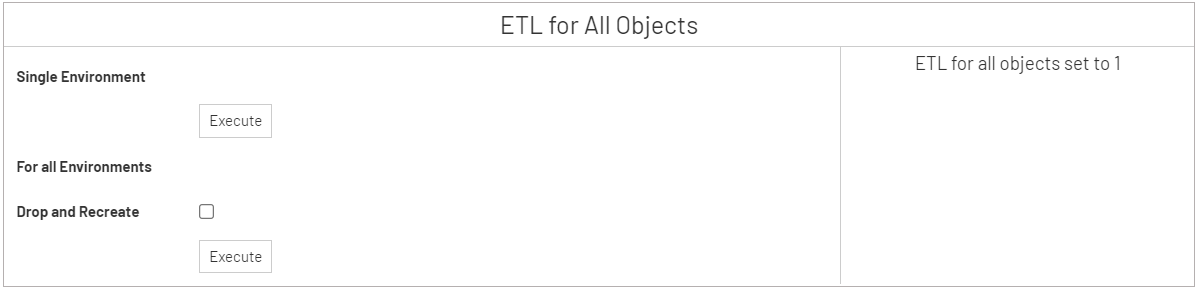
You can also choose which tables are included in the ETL from the Tables included in Refresh All worksheet. By default, all tables that are currently used by the template will be included in the ETL. To add more tables, change the Included in ETL for All Objects value to 1.
-
-
After selecting an object type, return to the Optional Field Tables info pages and run ETL for All Objects.
This will create your view or table. If you chose to create a table, the load will be incremental to shorten load time.
Regardless of the object type you selected, the new object will have the same name as the table preceded by the PVT_ prefix. The optional fields will appear as new fields, and the unique keys for Joins will be found in each object.

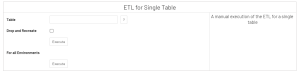
TipThe third Optional Field Tables info page—ETL for Single Table—allows you to run the ETL on a single table and change its flag value to 1.
If you are unable to run this info page on a particular table, check the Drop and Recreate flag and then re-run the operation.
-
Since optional field names are unique for each user, you must manually add your fields to each data model if you want them to be used in analyses. Please note that you may wish to add Prompts and Global Parameters as well depending on what you wish to do with your fields.
-
Go to the Data Models and Views tab and expand the selected folder.
-
Right-click the Data Model to change and select Design Data Model.
-
Follow the steps to add fields.
-