NetSuite Connection Setup
This topic describes how to set up a NetSuite connection for DataSync.12126, 18265
Before setting up the connection, make sure that:
-
DataSync is installed in HTTPS.
-
You have a NetSuite account with Administration permissions.
NetSuite supports two API schemas for retrieving data: SuiteTalk and SuiteQL. Each schema has different connection options.
-
SuiteTalk: An older SOAP-based service used to communicate with NetSuite. Grouping and aggregating aren't supported server side and must be handled client side. SuiteTalk provides full access to custom records, fields, and lists. Saved searches are supported via both the SOAP API and RESTLets.
Note: SuiteTalk supports only Token-Based Authentication. OAuthHeadless is not supported.
-
SuiteQL: A newer SQL-like API that supports joins, grouping, aggregations, and selecting specific columns. This API only supports selecting data and is recommended only when you're retrieving data.
Contents
Set up a NetSuite connection
To configure a connection in DataSync, you first need to create a custom NetSuite application in the NetSuite interface. This provides the values required to fill out the connection properties in DataSync.
For Token-Based
-
Log in to NetSuite.
-
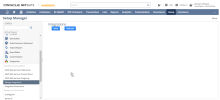
Under Setup, open the Setup Manager and select the Integration > Manage Integrations.
-
On the Integrations page, select New to create an integration.
-
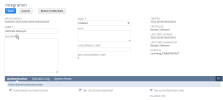
On the Integration page:
-
Enter a name for your integration and a description if needed
-
In the Concurrency Limit field, enter the number of concurrent sessions (up to a maximum of 5).
-
-
Under Token-based Authentication, select Token-Based Authentication.
-
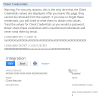
Save the integration. Once saved, NetSuite displays your Client ID and Client Secret. Store them securely, as they are displayed only once.
-
Continue with the steps bellow to complete the token setup:
-
Go to Setup > Company > Enable Features > SuiteCloud > Manage Authentication.
-
Make sure the Token-Based Authentication is selected, then save your changes.
-
Go to Setup > User/Roles > Manage Roles and create a new role or edit an existing role.
-
In the General section, enable Core Administration Permissions to include most of administrative permissions.
-
Under Subsidiary Restrictions, select All then check Allow cross-subsidiary record viewing.
-
Under Permissions > Setup, add the following permissions:
-
Access Token Management: Full
-
Log in using Access Tokens : Full
-
REST Web Services: Full (for SuiteQL)
-
SOAP Web Services : Full (for SuiteTalk)
-
Set Up SOAP Web Services : Full
-
User Access Token: Full
-
-
Under Permissions > Reports, add :
-
SuiteAnalytics Workbook: Edit
Permissions under Transactions and Lists will vary depending on the tables you want to access. For more details, see NetSuite Permissions.
-
-
Go to Lists > Employees > Employees, and assign the new role to a user.
-
Under Access > Roles, edit the employee and add the custom token role.
-
Go to Setup > User/Roles > Access Tokens, and create a new access token. Select the application, user, and role from the previous steps.
-
After creating the access token, NetSuite displays a Token ID and Token Secret. These correspond to the OAuthAccessToken and OAuthAccessTokenSecret. Save them securely.
-
In DataSync,create a new source connection for NetSuite.
Fill out the NetSuite Connection Properties.
-
Select Save.


For OAuthHeadless
-
Log in to NetSuite.
-
Under Setup, open the Setup Manager and select the Integration > Manage Integrations.
-
On the Integrations page, select New to create an integration.
-
On the Integration page:
-
Enter a name for your integration and a description if needed
-
In the Concurrency Limit field, enter the number of concurrent sessions (up to a maximum of 5).
-
-
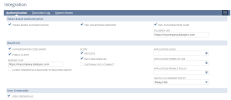
Under Token-based Authentication, select the following options:
-
TBA: Issue token endpoint
-
TBA: Authorization Flow
-
-
In SEI, open DataSync and create a new source connection for NetSuite.
Copy the Callback URL generated by DataSync.
-
Go back to NetSuite Integration page.
-
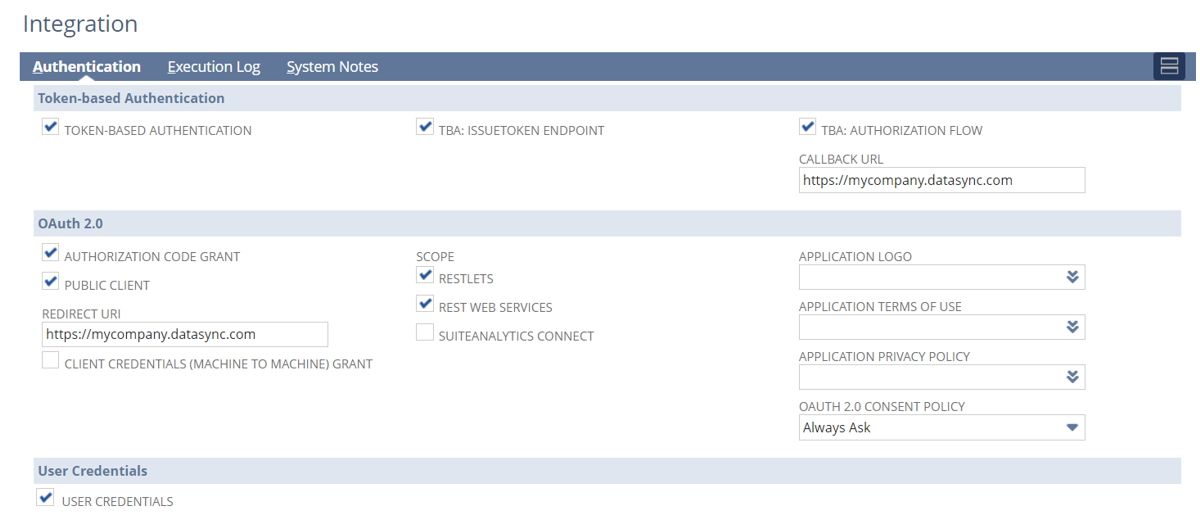
Under OAuth 2.0:
-
Paste the Callback URL into both the Callback URL and Redirect URI fields.
-
Select Authorization Code Grant and Public Client.
-
Set the OAuth 2.0 Consent Policy to Always Ask (recommended).
-
Select the appropriate Scope. It's recommended to include RESTLETS and REST WEB SERVICES.
-
Under User Credentials, select User Credentials.
-
-
Select Save.
-
NetSuite displays your Client ID and Client Secret. Store them securely, as they are displayed only once.
-
Return to DataSync:
-
Fill out the NetSuite Connection Properties.
-
Select Save.

-
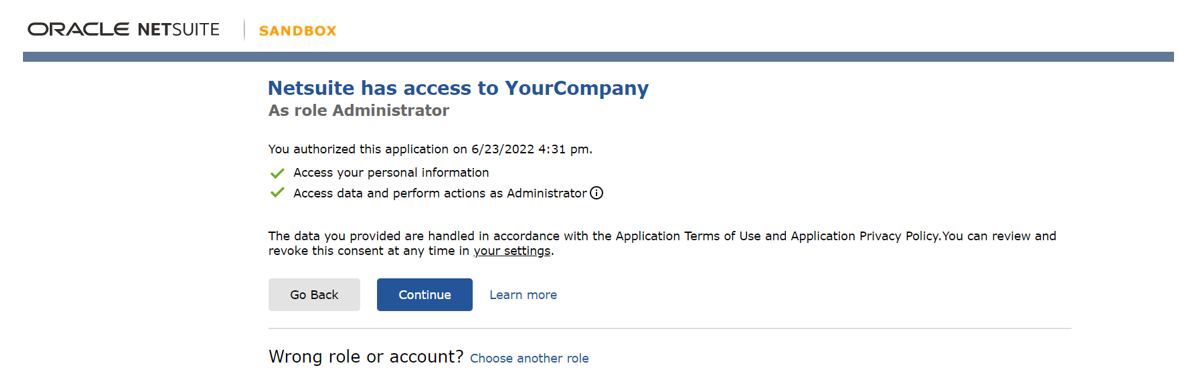
-
You'll be redirected to an authorization web page. Select Continue to complete the connection.


Connection properties
| Connection Properties | Description |
|---|---|
| Description | Enter a name to identify the connection in DataSync. |
| Schema |
The NetSuite schema used for the connection. Defines the authentication mode. Options: SuiteQL (recommended) or SuiteTalk. Note: For SuiteTalk, use Token-Based Authentication. You may need to create a token and check that the role has the correct permissions. |
| Account ID | Found in NetSuite under Setup > Company > Company Information. |
| Application ID | Provided when you save the application in NetSuite. Always include it to ensure proper access. Find saved applications under Setup > Integration > Manage Integrations. |
| Scope |
Use with OAuthHeadless to obtain access and refresh tokens. Values:
|
| Authentication Mode |
Select one:
|
| Callback URL | Required for OAuthHeadless. Enter the URL generated by DataSync. |
| Client ID | Provided when registering your OAuth application. |
| Client Secret | Provided when registering your OAuth application. |
| Access Token | Used with Token-Based. Replaces the username and password for SuiteTalk. |
| Token Secret | Used with the access token for SuiteTalk and Token-Based authentication. |
| Row Scan Depth | Number of rows scanned to determine columns. Must be 1–999. Default: 50. |
| Timeout |
Time (in seconds) to wait before canceling a connection attempt. In NetSuite, retrieving data from child tables or using aggregate columns can take a long time. For example, retrieving 1,000 Sales Orders with AggregateColumnMode set to ListAndRetrieve may take over 10 minutes. This is a known limitation of the NetSuite Web Services. If you're working with child tables or aggregate columns, it's recommended to set the timeout to 0. |
| Include Child Tables |
Displays tables for all child lists of an entity. For example, the CashRefund table includes a child list called ItemList, which appears as a separate CashRefund_ItemList table. This is useful for showing each item in its own row. Enabling this option may increase the total number of tables by several hundred. |
| Include Custom Field Columns |
Adds custom fields directly to tables as individual columns. This may reduce performance when loading metadata for the first time on an open connection. Metadata is cached per connection and cleared when the connection is closed. |
| Include Custom List Tables |
Adds custom list types as separate tables. This may reduce performance when loading metadata for the first time on an open connection. Metadata is cached per connection and cleared when the connection is closed. |
| Include Custom Record Tables |
Adds custom record types as separate tables. This may reduce performance when loading metadata for the first time on an open connection. Metadata is cached per connection and cleared when the connection is closed. |
| Aggregate Columns | Displays aggregated values from child collections. Requires Include Child Tables to be selected. |
| Additional Connection Properties | Advanced customization options for the connection. |
NetSuite permissions
This section applies only if you're using a custom role, which is required for Token-Based Authentication and optional for OAuthHeadless. If you're using the Administrator role with OAuthHeadless, no changes are needed—this role already includes all required access.
In some cases, additional permissions may be required to access specific tables. The list below shows commonly required permissions to use the connector. Most of these can be found under the Permissions menu for the selected role.

Permissions properties
| Tab | Permission | Description |
|---|---|---|
| Reports | SuiteAnalytics Workbook (View) | Allows access to SQL |
| Lists | Customer (View) | Used to test RESTlet connections. |
| Setup | Access Token Management | Allows users to create access tokens for Token-Based Authentication. |
| Custom <type> Fields (View) |
Grants access to custom fields of the selected type, including:
This permission is required when using Include Custom List Columns. |
|
| Other Custom Fields (View) | Grants access to other types of custom fields. Used with Include Custom Field Columns. | |
| Custom Lists (View) | Displays metadata for custom list tables. Used with Include Custom List Tables. | |
| Custom Record Types (View) | Displays metadata for custom record tables. Used with Include Custom Record Tables. | |
| Deleted Records (View) | Retrieves information for deleted records. | |
| Log in Using Access Tokens | Allows users to authenticate to REST or SOAP services using a token. | |
| Log In using OAuth 2.0 Access Tokens | Allows users to authenticate to REST services using OAuth 2.0. | |
| REST Web Services | Required for RESTlet access. Used when the schema is set to SuiteQL. | |
| SOAP Web Services | Required for testing and some custom field operations. Used when the schema is set to SuiteTalk (default). | |
| User Access Tokens | Allows tokens to be created for users using Token-Based Authentication . | |
| Custom Record | [Custom Record Name] |
Grants access to the specified custom record table. |