Configuration Specific to Each System
Sage X3
Opening Balance
If your accounts are not closed in Sage X3, Opening Balances must be loaded for each fiscal year.
Opening Balances generated from UDM are more detailed than those from Sage X3.
Therefore, this is why we highly recommend that you use Opening Balances from UDM and not the ones generated by the closing fiscal year from Sage X3.
Opening Balances must be generated before the loading of the Finance Staging cube.
To generate Opening Balances:
- Make sure the @@X3SIMULATED global variable is enabled:
- In the Administration section
 , click on
  Global Variables in the left pane.
 - Make sure the Script value is set to YES. If not, click on
 , change the value and click on
  Update.
- In the Administration section
- In the Data Models and Views tab, expand the Universal Data Model folder.
- Expand the Configuration and Sage X3 Specific folders.
- Right-click on the Opening Balance data model and select View Info Pages.
- In the Fiscal Year fields (From and To), enter the year you want to generate the Opening Balances for and click on Calculate Open Balance depending on your server (SQL or Oracle).


Mapping of Analytical Dimensions
In order to use the Analytical Dimensions, you must first do the mapping before loading the Finance Staging cube.
In order to do so:
- In the Data Models and Views tab, expand the Universal Data Model folder.
- Expand the Configuration and Sage X3 Specific folders.
- Expand the Analytical Dimension Mappings data model and open the Mapping view.

- Click on the cell of the module column then click on the Prompt symbol (purple question mark).
- In the Prompt window, select the Dimension you want to map to the Analytical Dimension ID and click on Confirm.


Sage X3 offers Analytical Dimensions for most of modules.
In another hand, UDM allows you to set 5 modules up to 20 Analytical Dimensions per module.
Here, we selected 5 modules (columns) for which we mapped the 4 first Analytical Dimensions only for the first module.
In other words, for the Grand Ledger (GL) Module:
- For the Analytical Dimension with ID 01, it will refer to CC (Cost Center)
- For the Analytical Dimension with ID 02, it will refer to DIV (Division)
- For the Analytical Dimension with ID 03, it will refer to IND (Industry)
- For the Analytical Dimension with ID 04, it will refer to MAR (Market)


- After having loaded the Finance Staging cube (refer to Building and Loading UDM Cubes for more details), whenever you will use Analytical Dimension (From Analytical Dimension 01 to Analytical Dimension 04 in relation to the example above) in your Views (in the right panel, click on
 to get access) from the Finance data model, it is the values you set in the Mapping view that will be used.
Sage 100
If you are using DataSync, do as follows. If not refer to Installation on Production Environment (Without DataSync).
For Sage 100, there is no Chart of Accounts to set. Chart of Accounts are the same as Company IDs.
The only thing you need to do is to map the reference currencies to each of the companies.
In order to do so:
- In the Data Models and Views tab, expand the Universal Data Model folder.
- Expand the Finance and Configuration folders.
- Right-click on the Sage 100 Ledger Currency Setup data model and select View Info Pages.
- Under the Load Companies section, click on Import and close the window.

- Expand the Sage 100 Ledger Currency Setup data model and open the Ledger Currency Setup view.
- In the Ledger Currency column, enter for each Company their reference currency.


Installation on Production Environment (Without DataSync)
If you are not using DataSync, you need to set up Global Variables before building an loading the cubes.
- In the Administration section , click on Global Variables in the left pane.
- In the upper right-hand corner, enter 100 in the Search Bar and press the Enter key.
- Click on the pencil icon to edit the three following Global Variables:
- For @@UDM_S100P_CPY: Enter the company code in the Script and Value fields.
- For @@UDM_SAGE_100_LIVE_COA_CODE: Enter the Chart of Account Code of the company in the Script and Value fields.
- For @@UDM_SAGE_100_LIVE_CURRENCY: Enter the currency of the company in the Script and Value fields.


Sage 300
Mapping of Chart of Accounts
To set the Chart of Accounts for each Company available in Sage 300, you first need to import the Companies.
To do so:
- In the Data Models and Views tab, expand the Universal Data Model folder.
- Expand the Finance and Configuration folders.
- Right-click on the Sage 300 Chart of Accounts Setup data model and select View Info Page.
- Under the Refresh Companies section, click on Import.

- Once imported, assign a Chart of Accounts code to each of them.

If the Companies share the same account structure, assigning the same Chart of Accounts is recommended.
If not: assign a different code of Chart of Accounts and perform an Account Grouping (refer to Account Grouping for more details).
To assign a code of Chart of Accounts:
- Expand the Sage 300 Chart of Accounts Setup data model and open the Company Setup view.
- In the Chart of Account column, select a row and enter a code.


Make sure to use a code with no spaces and no special characters.
Mapping of Analytical Dimensions
No mapping is required for Account Segments as they are already mapped in the UDM DimSubaccounts cube.
Regarding the Account Level Option Fields, compared to the version 8 of SEI, they are now mapped to User Defined Fields (UDF) in the UDM Accounts cube.
In order perform analyses on Optional Fields, we must first map the Optional fields to Analytical Dimensions in UDM.
To do so:
- In the Data Models and Views tab, expand the Universal Data Model folder.
- Expand the Configuration folder and Sage 300 Optional Fields Mapping data model.
- Open the Analytical Axes view.
- Click on one of the row of the Optional Fields columns then click on the Prompt symbol (purple question mark).
- In the Prompt window, select the Field Code you want to map to the Analytical Dimension ID and click on Confirm.


Choosing a default Sales Representatives
In Sage 300, you can assign multiple Sales Representatives to a Customer and assign a Percentage to them but there is no flag(indicator) to define the default Sales Representative. In order to define the default Sales Representative, we need to import the Customers with the 5 possible Sales Representative to a new table.
To assign a default Sales Representative:
- In the Data Models and Views tab, expand the Universal Data Model and Configuration folders.
- Right-click on the Sage 300 Customer Default Sales Rep data model and select View Info Page.
- Under the Generate Sales Rep List section, click on Generate.

- Expand the Sage 300 Customer Default Sales Rep data model and open the Default Sales Rep view.

In the generated list, the default Sales Representative is chosen by being the one with a higher percentage than the others. However, in cases where there are 2 Top percentage Sales Representative, you will need to define it manually through the Default Sales Rep column.
Unless you never plan to use the Default Sales Representative feature on a Customer for your BI Analysis (and use only the one assigned to an invoice or order), you need to re-generate the list as described above whenever you add new Customers.
Acumatica
Mapping of Company
To set the Chart of Accounts for each Company available in Acumatica, you first need to import the Companies.
To do so:
- In the Data Models and Views tab, expand the Universal Data Model folder.
- Expand the Finance and Configuration folders.
- Right-click on the Acumatica Chart of Accounts Setup data model and select View Info Page.
- Under the Refresh Companies section, click on Import.

- Once imported, assign a Chart of Accounts code to each of them.

If the Companies share the same account structure, assigning the same Chart of Accounts is recommended.
If not: assign a different code of Chart of Accounts and perform an Account Grouping (refer to Account Grouping for more details).
To assign a code of Chart of Accounts:
- Expand the Acumatica Chart of Accounts Setup data model and open the Company Setup view.
- In the COA column, select a row and enter a code.


Make sure to use a code with no spaces and no special characters.
Opening Balances
Opening Balances must be generated before the loading of the Finance Staging cube.
To generate Opening Balances:
- In the Data Models and Views tab, expand the Universal Data Model folder.
- Expand the Finance and Configuration folders.
- Right-click on the Acumatica Opening Balance data model and select View Info Pages.
- In the Year fields (From and To), enter the year for which you want to generate the Opening Balances.
- [Optional step] In the Company field, click on the Prompt symbol (question mark) to select the company for which you want to generate the Opening Balances.
- Click on Run.


Sage 200 UK
Depending on the type of installation performed, the Data Models used for the specific configuration will be in either the Finance or Configuration folder.
For the data to be taken into account, the steps below must be completed before loading the UDM cubes.
Editing the Global Variable
This section applies only to Single-Company environments, where DataSync is not used.
- Edit the Global Variable called @@UDM_200UKLIVECPYID by clicking on the pencil icon located on the right.

- Change the value in the Script field and click on Update.
- You should have a result similar to this:


Make sure to use a code with no spaces and no special characters.
Opening Balances
Opening Balances must be generated before loading the Finance Staging cube.
To generate Opening Balances:
- Right-click on the Sage 200 UK Opening Balance data model and select View Info Pages.
- In the Fiscal Year fields (From and To), enter the year you want to generate the Opening Balances for and click on Generate.


Updating the Fiscal Calendar
After installing the template or after generating new fiscal years from Sage 200 UK, you must update the Fiscal Calendar so that the Finance data models can take into account all fiscal years.
- Right-click on the Sage 200 UK Update Fiscal Calendar data model and select View Info Pages.
- Click on Update.


Mapping of Chart of Accounts
To set the Chart of Accounts for each Company available in Sage 200 UK, you first need to import the Companies.
This section applies only to Multi-Company environment. If you are using a Single-Company environment, the Chart of Accounts will be hardcoded S200-LIVE.
To do so:
- In the Data Models and Views tab, expand the Universal Data Model folder.
- Expand the Finance and Configuration folders.
- Right-click on the Sage 200 UK Chart of Accounts Setup data model and select View Info Page.
- Under the Refresh Companies section, click on Import.

- Once imported, assign a Chart of Accounts code to each of them.

If the Companies share the same account structure, assigning the same Chart of Accounts is recommended.
If not: assign a different code of Chart of Accounts and perform an Account Grouping (refer to Account Grouping for more details).
To assign a code of Chart of Accounts:
- Expand the Sage 200 UK Chart of Accounts Setup data model and open the Company Setup view.
- In the Chart of Account column, select a row and enter a code.


Make sure to use a code with no spaces and no special characters.
Generating Retained Earnings
To obtain the amount of Retained Earnings for the Equity section:
- Right-click on the Sage 200 UK Retained Earnings data model and select View Info Pages.
- In the Fiscal Year fields (From and To), enter the year you want to generate the Opening Balances for.
- In the Account Number field, enter the account used for Retained Earnings and click on Generate.


Sage Intacct
Mapping User Defined Dimensions to Pre-Configured Fields
- Open DataSync and locate the Glentry and Glbudgetitem tables. Select the desired User Defined Dimension fields and sync them by checking the box in the Sync column.
- Open the Extractions interface and add the Tables from step 1. The added User Defined Dimensions are shown without the Gldim prefix in the Extractions interface (e.g., Gldimpromo would now appear as Promo). The fields from the Glentry and Glbudgetitem tables should be included for the description.
- Run Validate and Build followed by Truncate and Load. Unfortunately, due to the unique nature of User Defined Dimension names, they cannot be synced automatically.
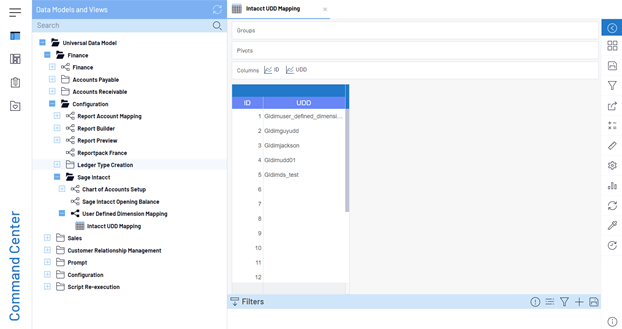
- Go to Universal Data Model, and select Finance, then Configuration, followed by Sage Intacct, User Defined Dimension Mapping and finally Intacct UDD Mapping.
- Use the Prompt to map your User Defined Fields.
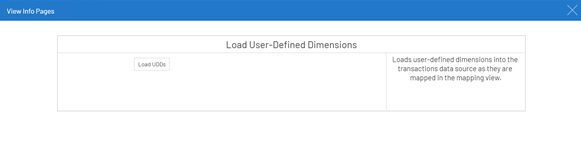
- Right-click on the UDD Mapping for Live Template data model in the Data Models and Views menu (shown below), then select View Info Pages. Now, select the Load User-Defined Dimensions Info Page.
- Running the Load User-Defined Dimensions Info Page updates the existing views and assigns a name from UDD01 to UDD20 to the selected User Defined Dimensions. The fields are pre-configured and already have Prompts as well as an attached description. Users can change the assigned User Defined Dimension names from within the data model if desired.

Please note that completing the process outlined above is necessary in order to map User Defined Dimensions to pre-configured fields in the Sage Intacct UDM template regardless of whether or not you already completed these steps for the Sage Intacct LIVE template.
Mapping of Chart of Accounts
To set the Chart of Accounts for each Company available in Sage Intacct, you first need to import the Companies.
To do so:
- In the Data Models and Views tab, expand the Universal Data Model folder.
- Expand the Finance and Configuration folders.
- Expand the Sage Intacct folder.
- Right-click on the Chart of Accounts Setup data model and select View Info Page.
- Under the Import Companies section, click on Import.

- Once imported, assign a Chart of Accounts code to each of them.

If the Companies share the same account structure, assigning the same Chart of Accounts is recommended.
If not: assign a different code of Chart of Accounts and perform an Account Grouping (refer to Account Grouping for more details).
To assign a code of Chart of Accounts:
- Expand the Chart of Accounts Setup data model and open the Company Setup view.
- In the COA column, select a row and enter a code.


Make sure to use a code with no spacesandno special characters.
Opening Balances
Opening Balances must be generated before the loading of the Finance Staging cube.
To generate Opening Balances:
- In the Data Models and Views tab, expand the Universal Data Model folder.
- Expand the Finance and Configuration folders.
- Right-click on the Sage Intacct Opening Balance data model and select View Info Pages.
- In the Year fields (From and To), enter the year for which you want to generate the Opening Balances.
- Click on Generate.


Global Consolidation Book Exchange Rates
Book Exchange Rates must be generated before the loading of the Finance Staging cube.
This step is only required if the Global Consolidation module is enabled in Sage Intacct.
To generate book exchange rates:
-
In the Data Models and Views tab, expand the Universal Data Model folder.
-
Expand the Finance > Configuration > Sage Intacct folders.
-
Right-click on the Book Exchange Rates data model and select View Info Pages.
-
In the Years fields, provide a range of years within which you want to generate your exchange rates.
-
Leave the Generate Lines for Manual Entry option unchecked so that the process calculates the exchange rates for every account-month combination based on real Sage Intacct data (recommended).
-
Selecting this option will hard-code all rates to 1 and you will have to manually enter rates later.
-
-
Click Generate.
-
Expand the Book Exchange Rates data model and open the worksheet to verify your exchange rates and to make adjustments (data entry) if needed.

To view global consolidations with transaction details:
In UDM, Book IDs are mapped to the Ledger Type. When running a report, all Book IDs should show up in the prompt for Ledger Type.
-
In the Data Models and Views tab, expand the Universal Data Model folder.
-
Expand the Finance folder and the Finance data model.
-
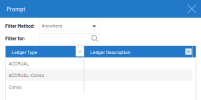
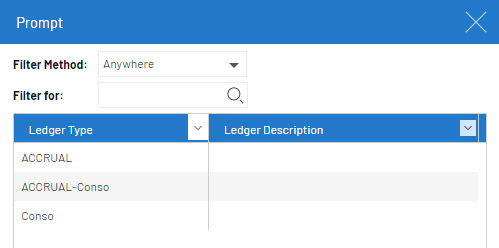
Open any view and click the prompt button for Ledger Type in the selection page.
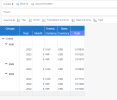
In the example below, Ledger Type ACCRUAL is the default book in Sage Intacct, and Conso is a global consolidation book.
-
Select the un-hyphenated consolidated book (ex. Conso) to view the same level of details as in Sage Intacct.
-
Select any hyphenated ledger type (ex. ACCRUAL-Conso) to view transaction details for the consolidated book specified after the hyphen.
(Optional) To change the default book for selection pages:
-
In the Administration menu, click Global Variables in the left pane.
-
In the search bar, enter LEDTYP and press Enter.
-
Click Edit on the right for the appropriate global variable (@@UDM_DFTLEDTYP).
-
In the Script field, enter your desired default Book ID (ex. ACCRUAL).
-
Click Update.