Subscribe
Users can subscribe to the views where they already have access to receive them on a regular basis according to the schedule and format of their choice.
-
In the Settings menu (right panel), click
and select Subscribe.
TipAlternatively, this can also be accomplished by right-clicking a view in the Data Models and Views tab and selecting Subscribe.
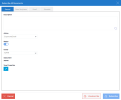
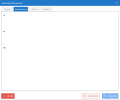
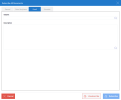
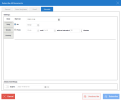
- The Subscribe All Documents dialog box is displayed. Enter the parameters described below in the appropriate tabs (General, Other Recipients, Email, Schedule).
- Click Subscribe.
Existing scheduled views can be unsubscribed by right-clicking on a View in the Data Models and Views tab and selecting Subscribe then Unsubscribe.
| Parameter | Description |
|---|---|
| General |
The General tab is used to define specific features. |
| Description | Identifies your current subscription. It will also be displayed to the administrator in the main Scheduler. |
| Action | Determines if you want to receive the view by email or archive it in a folder. |
| Owner | Select the user. |
| View Properties | Opens a new window to define the format that will be generated such as: PDF, Excel, etc. |
| Other Recipients |
The Other Recipients tab allows you to add more recipients to the view subscription in addition to the owner. |
|
The Email tab is used to create a template for automatic emails; you can write a title in the Subject field and a detailed description for the email template. The |
|
| Schedule |
The Schedule tab is used to set a schedule to run, save, and email the Views. There are various options to define the frequency to run the job as well as set an expiration date. |


