Page Setup
The Page Setup window allows users to customize the layout of their output before exporting a View, Dashboard or Report.
To access the Page Setup window:
-
Open the Settings menu (right-hand panel of an open View, Dashboard or Report) by clicking
 Sharing.
 -
Select Page Setup.
-
Click the appropriate tab(s) to customize the page setup: General, Margins, Header / Footer, Grid, Report, Excel Export.
-
Click Confirm to save any adjustments made to the page setup.
General Tab
The General tab allows the user to define the general configuration options of their export page for Views, Dashboards and Reports.
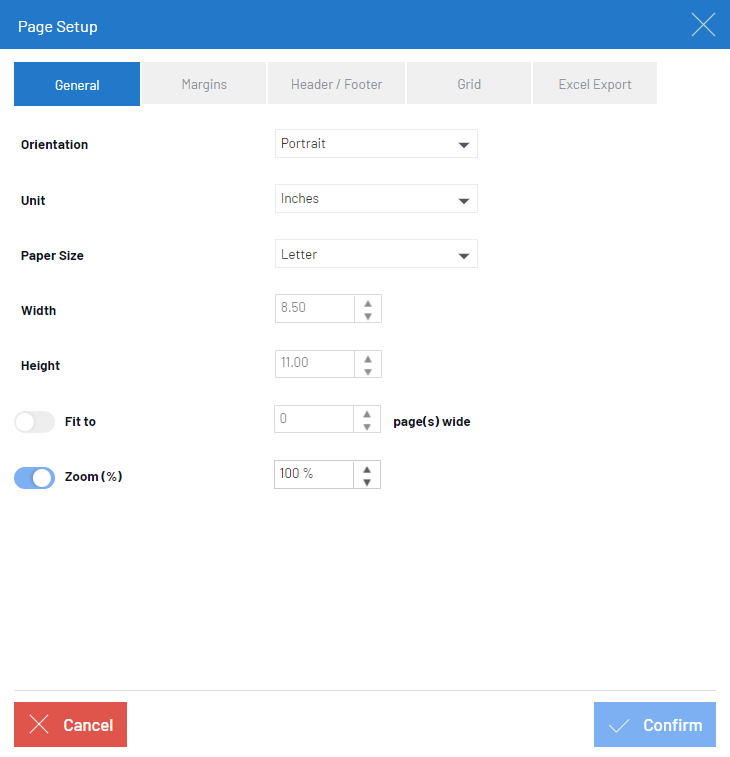
| Field | Description |
|---|---|
| Orientation | Defines whether the page will be exported in portrait or landscape orientation. |
| Unit | Defines the unit of measurement (i.e., centimetres or inches) displayed for paper size and margins. |
| Paper Size | Sets a standardized page size (i.e., width and height) for their export; users can also define a width and height manually by selecting the Custom Size option then entering the desired values in the Width and Height fields. |
| Width | Field that represents the width of the export page; its value will update automatically depending on the options selected in the previous three fields, however, users will only be able to change the value manually if the Custom Size option is selected in the Paper Size field. |
| Height | Field that represents the height of the export page; its behaviour is identical to the Width field. |
| Fit to - page(s) wide |
Toggle that defines the number of pages within which the content of their export will be fit; Fit to - page(s) wide and Zoom (%) are mutually exclusive options. |
| Zoom (%) | Toggle that defines the zoom percentage to which their export will be displayed; Fit to - page(s) wide and Zoom (%) are mutually exclusive options. |
The Fit to - page(s) wide and Zoom (%) options only appear in the General tab if they are applicable to the export type.
Fit to features are only compatible with PDF, XLSX and XLS type exports. Exported charts and dashboards both automatically fit one image per page.
Margins Tab
The Margins tab allows users to configure the margins of their export for Views, Dashboards and Reports. The tab also provides a simplified margin preview in the center of the Page Setup window which updates in real-time based on the values entered by the user.
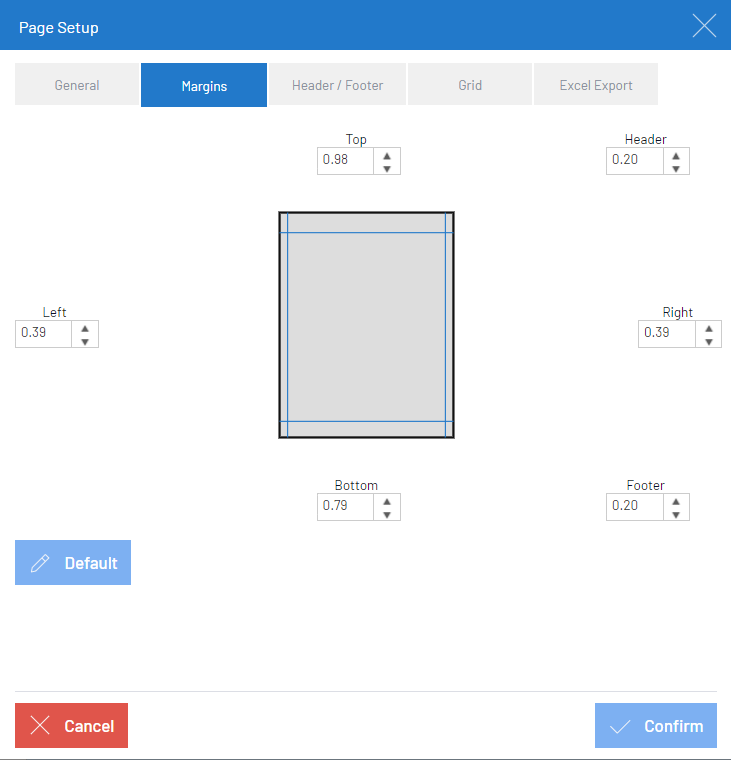
| Field | Description |
|---|---|
| Default | Button that causes all export margins to revert to their initial, default values. |
| Top, Left, Right and Bottom | Fields that defines the distance between their export content and the border of the page in all four directions. |
| Header and Footer | Fields that defines the space between their header or footer and the top or bottom border of the page respectively; the values in these fields should always be less than the margin values to avoid overlapping |
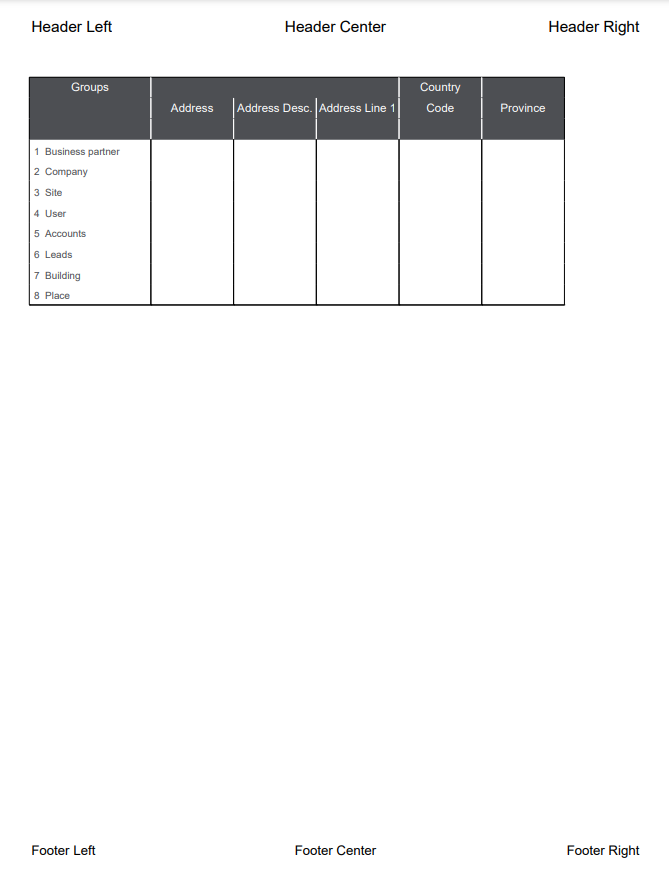
Header / Footer Tab
The Header / Footer tab allows users to customize headers and footers and add them to their export for Views, Dashboards and Reports. The tab also provides a preview of how the header or footer will appear in the export.

.CSV file format does not support SEI's Header / Footer feature. Therefore, headers and footers will not appear on any .CSV exports.
| Field | Description |
|---|---|
| Customize Header | Allows users to customize their export's header; clicking the Customize Header button will display the Header Customization pop-up. |
| Customize Footer | Allows users to customize their export's footer; clicking the Customize Footer button will display the Footer Customization pop-up. |
Header / Footer Customization Pop-Up
The Header or Footer Customization pop-up is where users can create and edit their export's headers or footers respectively.

| Field | Description |
|---|---|
| Left Section | Text editing box for left-justified header or footer text. |
| Center Section | Text editing box for center-justified header or footer text. |
| Right Section | Text editing box for right-justified header or footer text. |
To begin adding header or footer text, click anywhere in the desired section and begin typing.
XLSX and XLS exports have a 255 character limit for headers and footers. Therefore, all 3 header or footer sections (i.e., left, center and right) combined must have less than 255 characters total. If your header or footer has more than 255 combined characters, the text will be truncated after the first 252 characters in XLSX and XLS exports.
Formatting Toolbar
The formatting toolbar at the top of the pop-up window allows users to further edit and customize their export's headers and footers.

| Formatting Toolbar Option (left to right) | Description |
|---|---|
| Bold | Makes the header or footer text bold. |
| Italic | Makes the header or footer text italicized. |
| Underline | Underlines the header or footer text. |
| Strikethrough | Makes the header or footer text strike-through. |
| Font Size | Allows the user to change the font size of their header or footer text; the default font size is 9 for headers and 8 for footers. |
| Font Color | Allows the user to change the colour of their header or footer text; the default font color for headers and footers is black. |
| Insert Image | Allows the user to insert an uploaded image file into their header or footer; this feature is incompatible with XLS exports since Excel does not support images in headers or footers |
| Insert Keyword |
Drop-down list that allows users to insert both SEI-specific and general keywords (e.g., External Link, Data Model Parameters, Date, etc.) into their header or footer. Certain keyword options (i.e., Date, Time, Data Model Parameters and Global Variables) will cause a second drop-down list to appear to the right from which users can select additional options regarding the keyword type before inserting it into their header or footer text. Note
Certain keyword options are exclusive to Worksheets, Dashboards, Reports or Charts, so it is normal if some keyword types do not appear when a user expands the Insert Keyword drop-down list. Keyword Types:
|
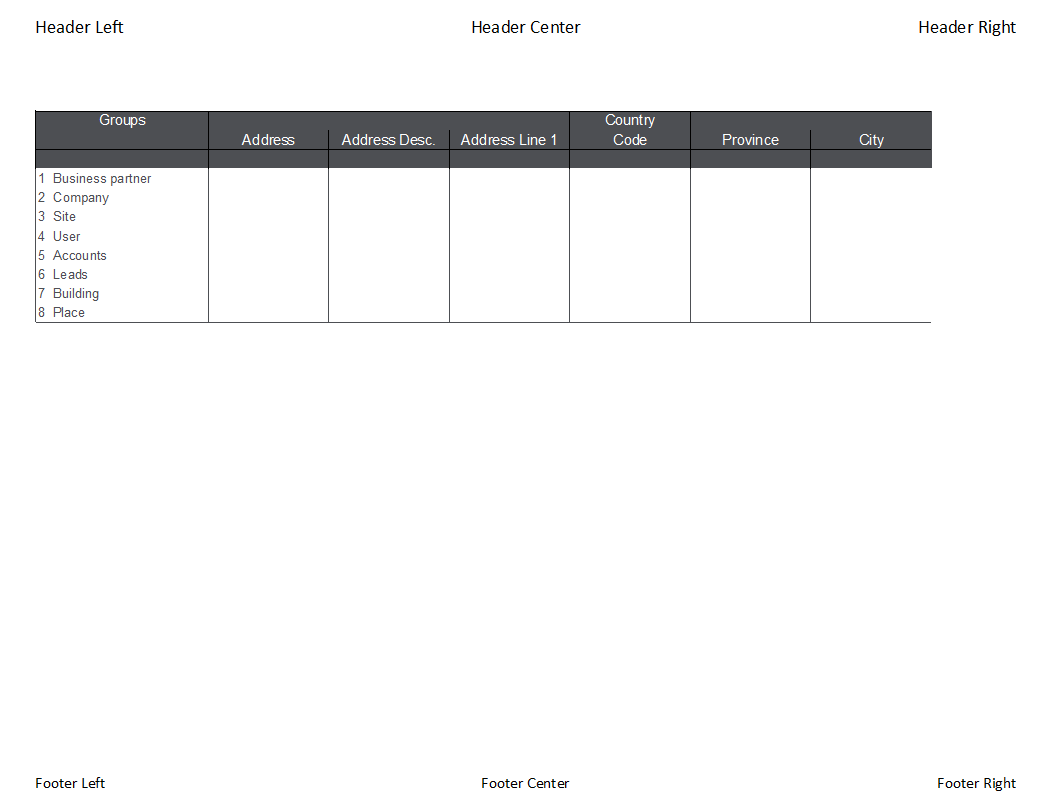
Header or footer text can overlap as shown in the image below. If that happens, users can re-open the Header or Footer Customization pop-up and add the necessary spacing, indentations or line breaks so that their text does not overlap.

Users should always review the header and footer preview in the Header / Footer tab before clicking the Confirm button.
|
Example of PDF Export
|
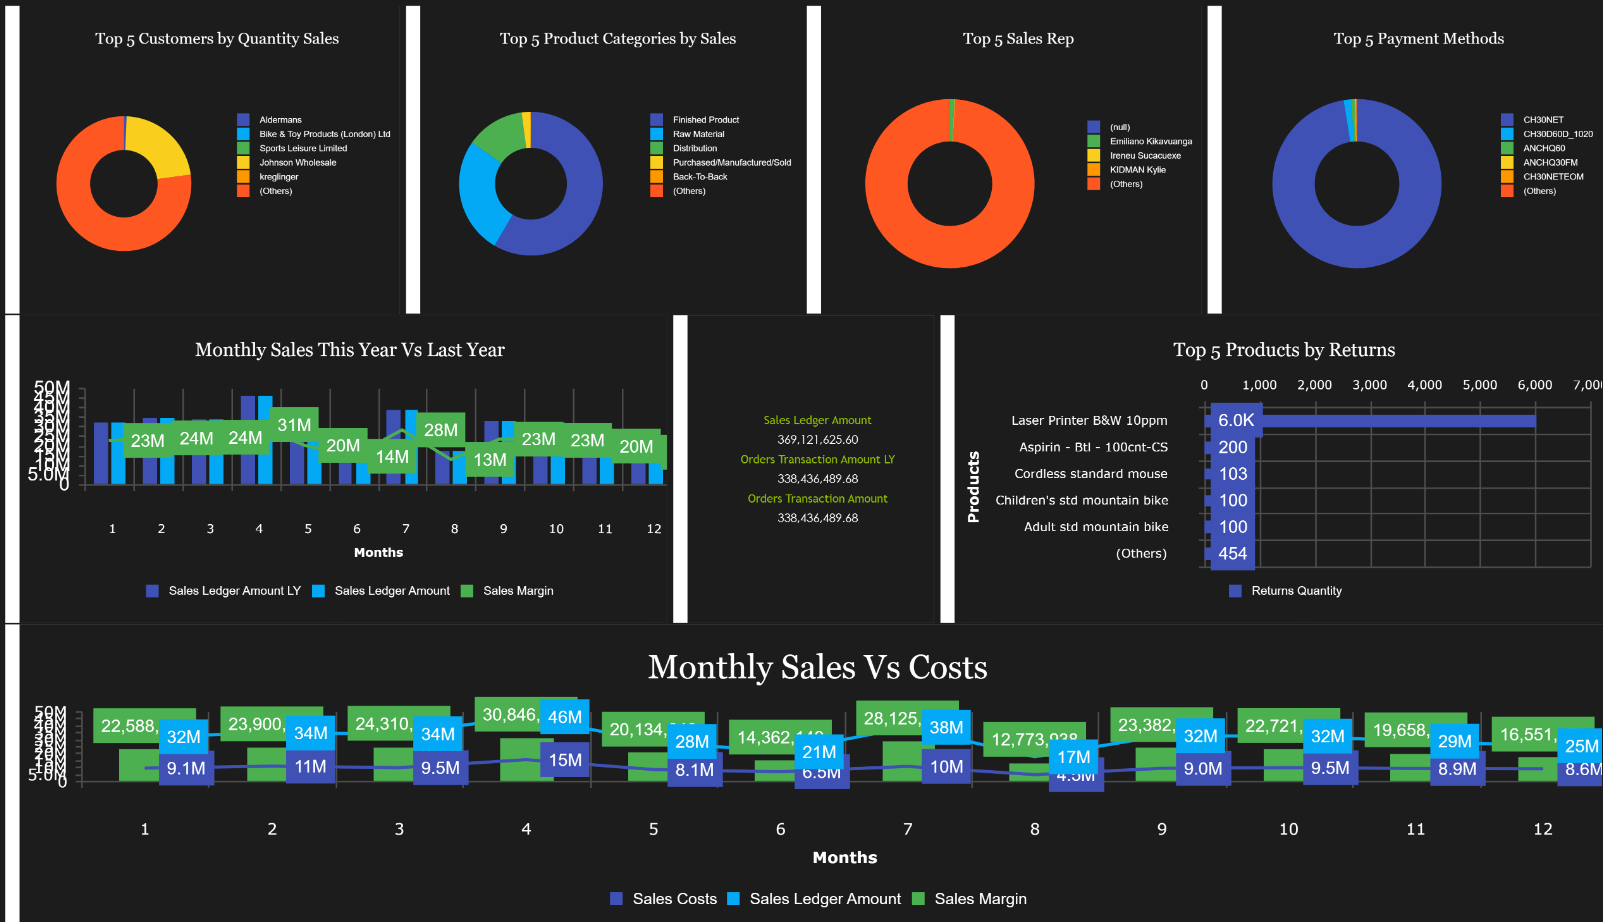
Example of Excel Export
|
Example of PNG Export
|
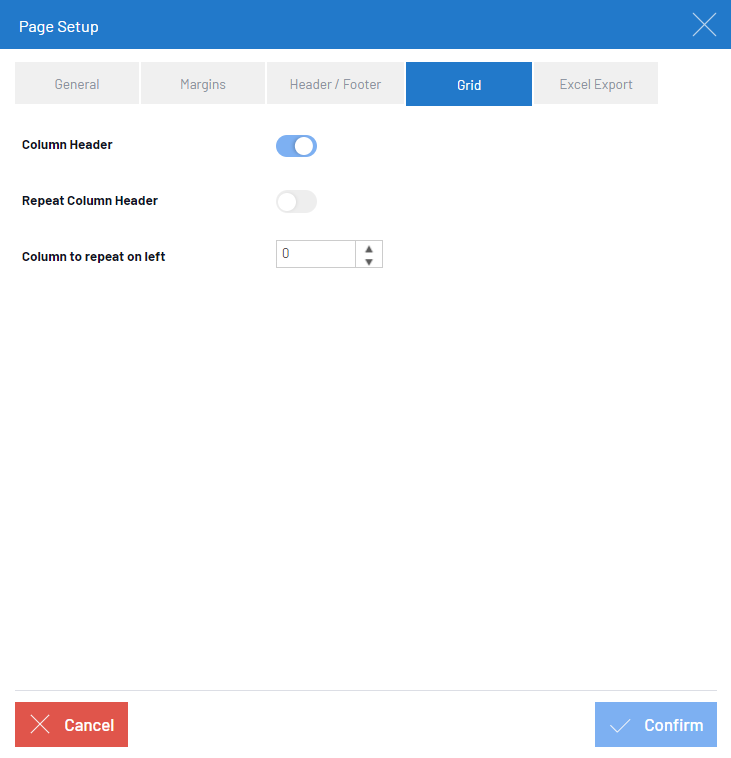
Grid Tab
The Grid tab allows users to configure their export's column headers for worksheets.
| Field | Description |
|---|---|
| Column Header | Toggle that determines whether or not column headers will appear in an export; for the two other grid tab fields to appear, the Column Header toggle must be activated. |
| Repeat Column Header | Toggle that determines whether or not a worksheet's column headers will repeat at the top of each page break when exported. |
| Column to Repeat on Left | Allows to specify how many of a worksheet's columns will be shown when exported; the value indicated cannot be greater than the number of columns in the worksheet. |
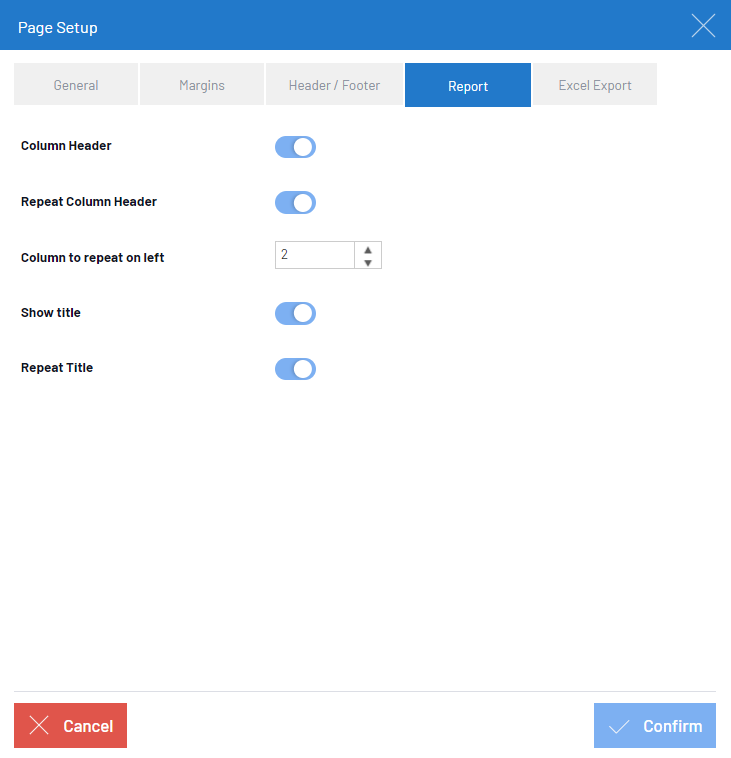
Report Tab
The Report tab allows users to configure both the column headers and title for Reports.
| Field | Description |
|---|---|
| Column Header | See explanation in the Grid Tab section above. |
| Repeat Column Header | See explanation in the Grid Tab section above. |
| Column to Repeat on Left | See explanation in the Grid Tab section above. |
| Show Title | Toggle that determines whether or not the report title will be shown when exported. |
| Repeat Title | Toggle that determines whether or not the report title will be repeated at the top of each page break when exported. |
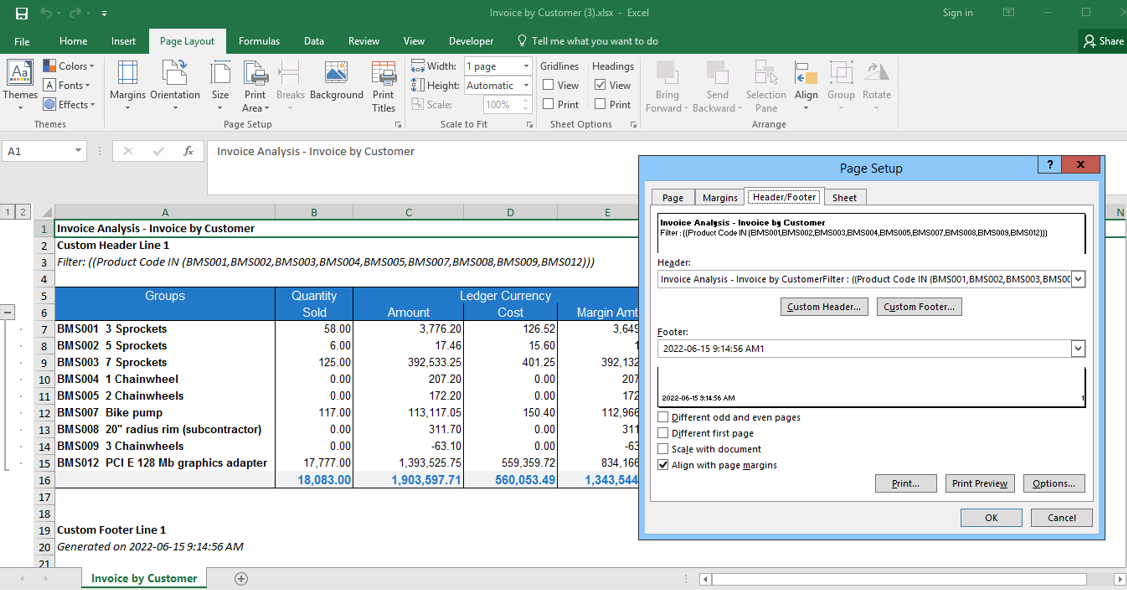
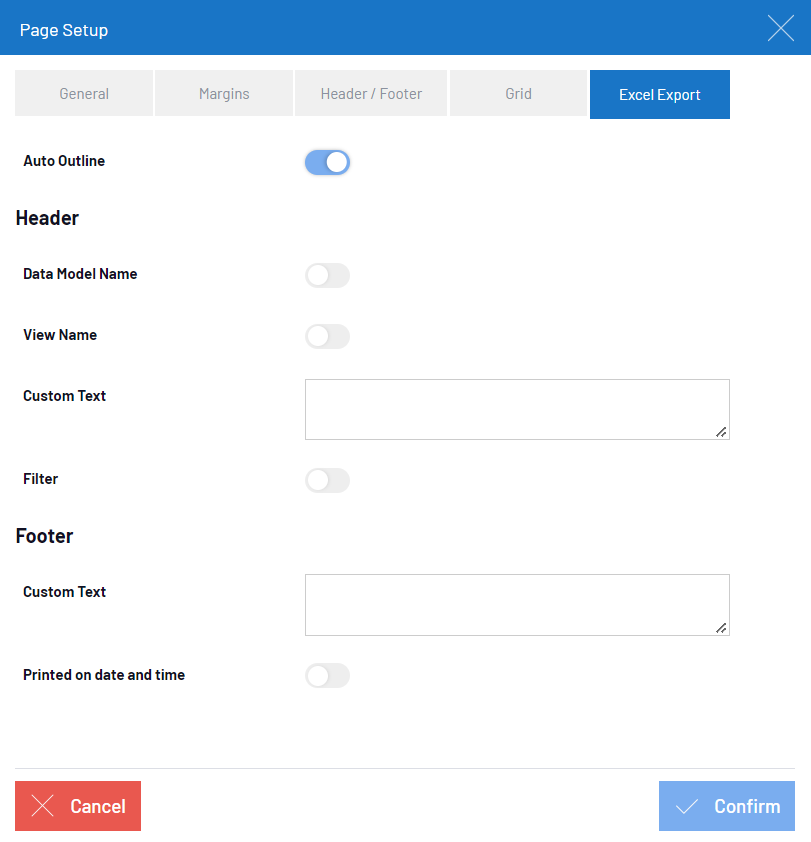
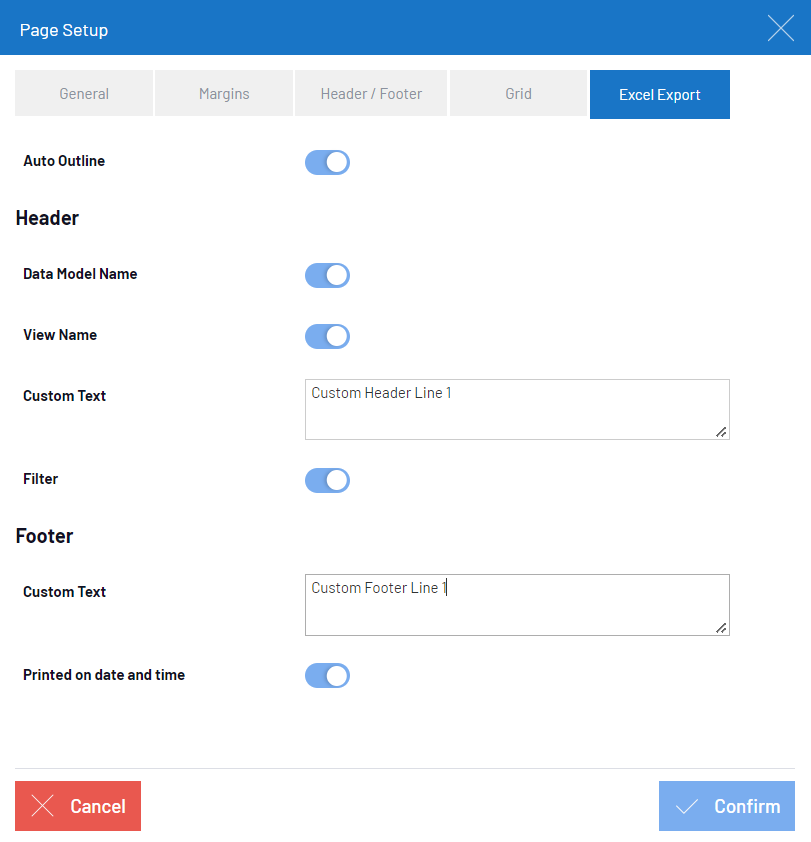
Excel Export
The Excel Export tab allows users to customize headers and footers that are added to the grid when exporting Views, Dashboards or Reports to an Excel file.
| Field | Description |
|---|---|
| Auto Outline | Click the toggle button to remove the data (group) outline in the exported file. |
| Data Model Name | Click the toggle button to add the data model name to the header. |
|
View Name / Dashboard Name / Report Name |
Click the toggle button to add the view, dashboard or report name to the header (depending on the source type). |
| Custom Text | Enter additional text as required to the header and/or footer. |
| Filter |
Click the toggle button to add filters present in the view, dashboard or report to the header. Note: Filters always appear in English. |
| Printed on date and time |
Click the toggle button to add the date and time to the footer when the view, dashboard or report was exported. Note: The date and time and accompanying text always appear in English. |
|
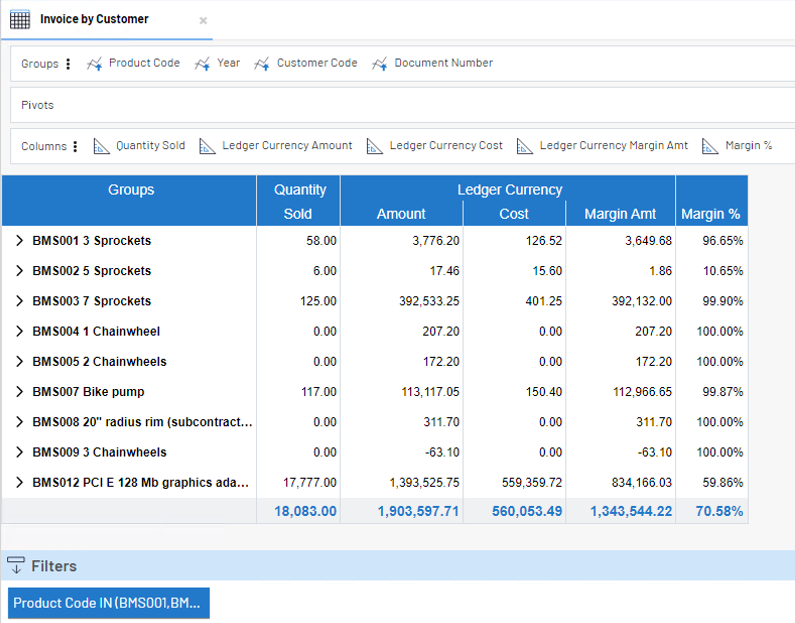
Worksheet view
|
Excel Export settings
|
Result of Excel Export
|
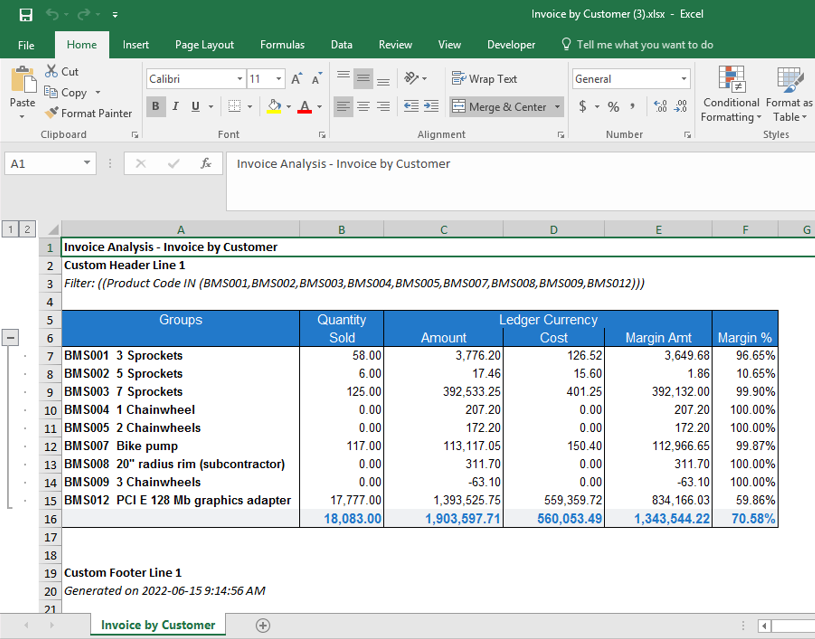
If you print the Excel file, the headers and footers will appear in addition to any headers and footers defined in the Page Setup dialog box in Excel Add-in or in the Header / Footer tab. This does not affect the viewing.