Configuring SEI for Sage 300 Embed
This topic describes the steps to configure the SEI for Sage 300 Embed interface so that you can access your data.
Note: The SEI Menu Configurator applies to all companies. A change to the menu for one company will be visible to all other companies.
-
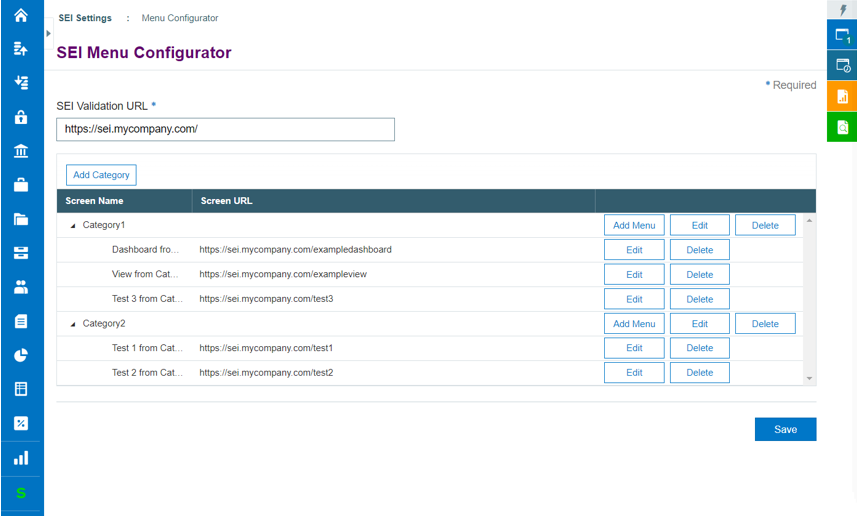
Click the S icon and navigate to SEI Settings > Menu Configurator.
-
Enter the SEI validation URL in the field. This is the URL of your SEI server. The protocol must be HTTPS.
For example: https://sei.mycompany.com

-
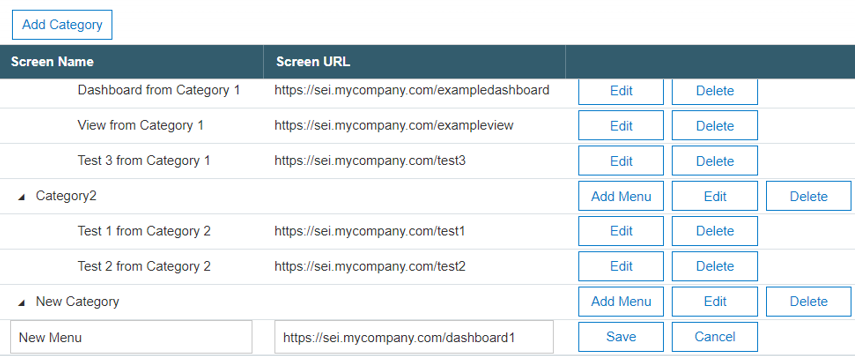
Add a category:
-
Click Add Category.
-
Enter a name.
-
-
Add a menu to the category:
-
Click Add Menu.
-
Enter the name and the URL you want this menu to open to. The URL is the SEI external link of your view, dashboard, or report.
Note: The URL must start with the same string as the SEI validation URL; for example: https://sei.mycompany.com/dashboard1. The URL is also case sensitive.

-
-
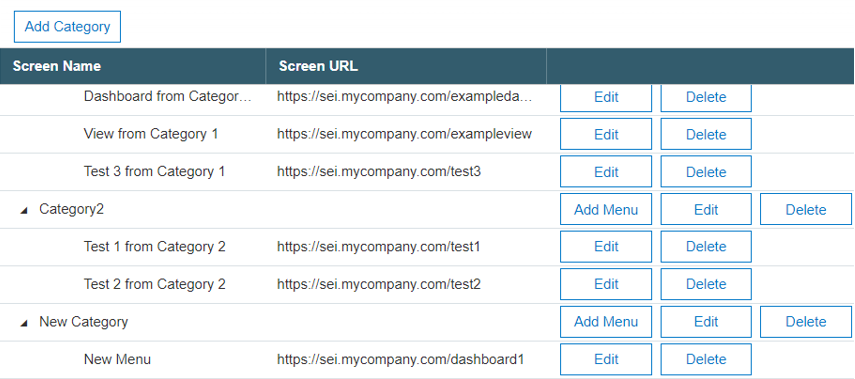
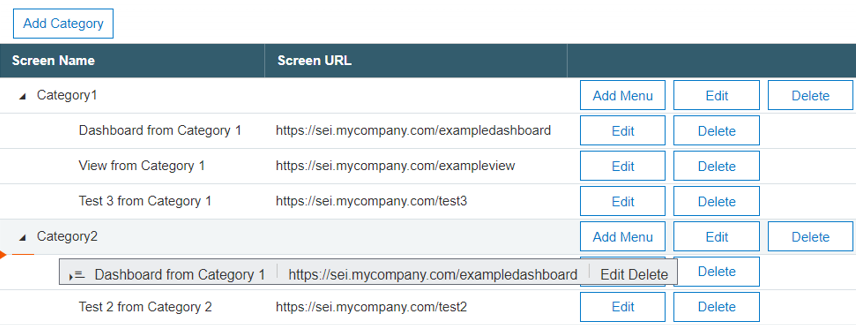
To reorder a category or a menu item, drag and drop the row to the desired place in the table.
-
Repeat Steps 3 to 5 as needed.
-
Click Save at the bottom of the page to save the configuration.

To view your data
-
To view the configuration changes, you must sign out and sign back in.
-
Click the S icon and select the category and menu you created.
The view, dashboard, or report is displayed.


To edit or delete a category or a menu
-
To edit the details of a category or menu, click Edit, then click Save after making your changes.
-
To delete a menu or a category, click Delete. Deleting a category will also delete all the menus in that category.