Web Views
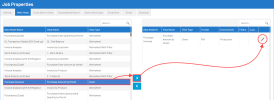
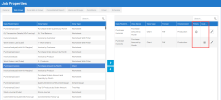
This page gives you the option to select the Web Views to run automatically, search from the generic search box or use the filter to search a specific view. The types of web views available for distribution are worksheets, reports, dashboards, and workbooks. Note that you must configure the page setup within the workbook itself for all web view distributions.
To start scheduling a web view distribution:
-
Click the Views of your choice and move them to the right-hand box using the arrows.
- Once this is done, the Filter option can be
activated by clicking
.
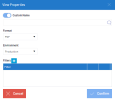
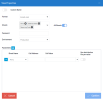
- Set the appropriate properties for your distribution.
Refer to Worksheet, Report, and Dashboard View Properties or to Workbook View Properties for steps on how to configure their distributions.
Worksheet, Report, and Dashboard View Properties
| Property | Description |
| Custom Name |
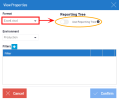
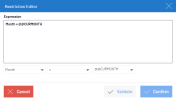
Toggle the button to enable a custom name, if needed. This option allows you to customize the distribution output files, in which you can add a custom name with multilingual options and add Global Variables and Special Variables. Invoice by Customer @@CURYEAR Period @@UDM_CURPER It is important to note that:
|
| Format |
Select the format: PDF, Excel(.xlsx), Excel(.xls), XML, CSV, or External Link. The export format can be selected for each view. For Report type views, if you select Excel or Excel Add-In in the drop-down list, the Reporting Tree feature becomes available. When enabled, one sheet is generated for each node of the Reporting Tree. |
| Environment | Select the environment on which the view is run. |
| Execute stored procedure if exists |
When selected for a given view (worksheet, chart, dashboard, or report), all the unique stored procedures associated to the data models used in the view will be executed with default parameters before generating the document. This setting is not currently available for the workbook or the Excel Add-in. If a dashboard contains three worksheets A, B, and C, and both A and B are based on the same data model, only two stored procedures will be executed: one for the data model of A and B, and one for the data model of C. |
| Filters |
When this option is enabled, the distribution of dashboards uses the Global Parameters used as filters in the filtering panels to impact only the views that have these same Global Parameters. The Filter option allows the selection of specific data to be distributed.
|
| Confirm | Click to close the View Properties dialog box. |
Note that when a Custom Name or Filter is applied to a view, a check-mark will indicate it in the respective columns for each view.
Workbook View Properties
While the workbook view properties are largely similar to the worksheet, report, and dashboard view properties, the Workbook View Properties window differs in that it has two additional sections: Sheets and Protection. There is also a Parameters section in place of the Filters section.
| Property | Description |
| Custom Name |
Click the toggle button to enable the Custom Name field, if needed. Just like with worksheets, reports, and dashboards, you can still add a custom name with multilingual options and add Global or Special Variables. |
| Format | Set the format for the workbook: PDF, Excel, CSV, or External Link. The export format can be selected for each view. Note that if a workbook is set to PDF format it can be turned into a Consolidated Report. |
| Sheets |
Select which sheets from the workbook you want distributed. If you want to add all of them to the distribution, toggle the All Sheets button to the left of the text box. |
| Password |
Optionally set a password for the distribution file. |
| Environment | Select the environment on which the view is run. |
| Parameters |
Add a filter for a sheet in the workbook.
|
| Confirm | Click to close the View Properties dialog box. |
| Save | Click to save the distribution. |
