Environments and Data Sources
Environments and data sources work together to manage and organize how users access data in SEI. Typically, you create separate environments—such as Production or Test—to represent different contexts or stages. Within each environment, you define one or more data sources, each representing a specific database connection.
Every data model in SEI is based on a single data source. You can associate several data sources with a single environment, and quickly switch your active environment at any time using the Environment dropdown in the toolbar. The selected environment applies to all open views.

Add an environment
Environments allow you to set up separate configurations for different contexts, such as Production or Test.
-
Go to Administration > Env. & Data Sources in the left panel.
-
In the Environments panel, click the + Add button.
-
Enter a name for your new environment.
-
(Optional) Click Set as Default at the bottom of the panel to make this environment the default for new users.
Add a data source
A data source contains the connection details for a specific database. When you create a data source, it becomes available in all environments, though its settings can be configured separately for each environment.
To add a new data source:
-
Select your desired environment.
-
In the Data Sources panel, click the + Add button at the top.
-
Enter a descriptive name for the new data source.
The new data source now appears in every environment and is ready to be configured as needed.
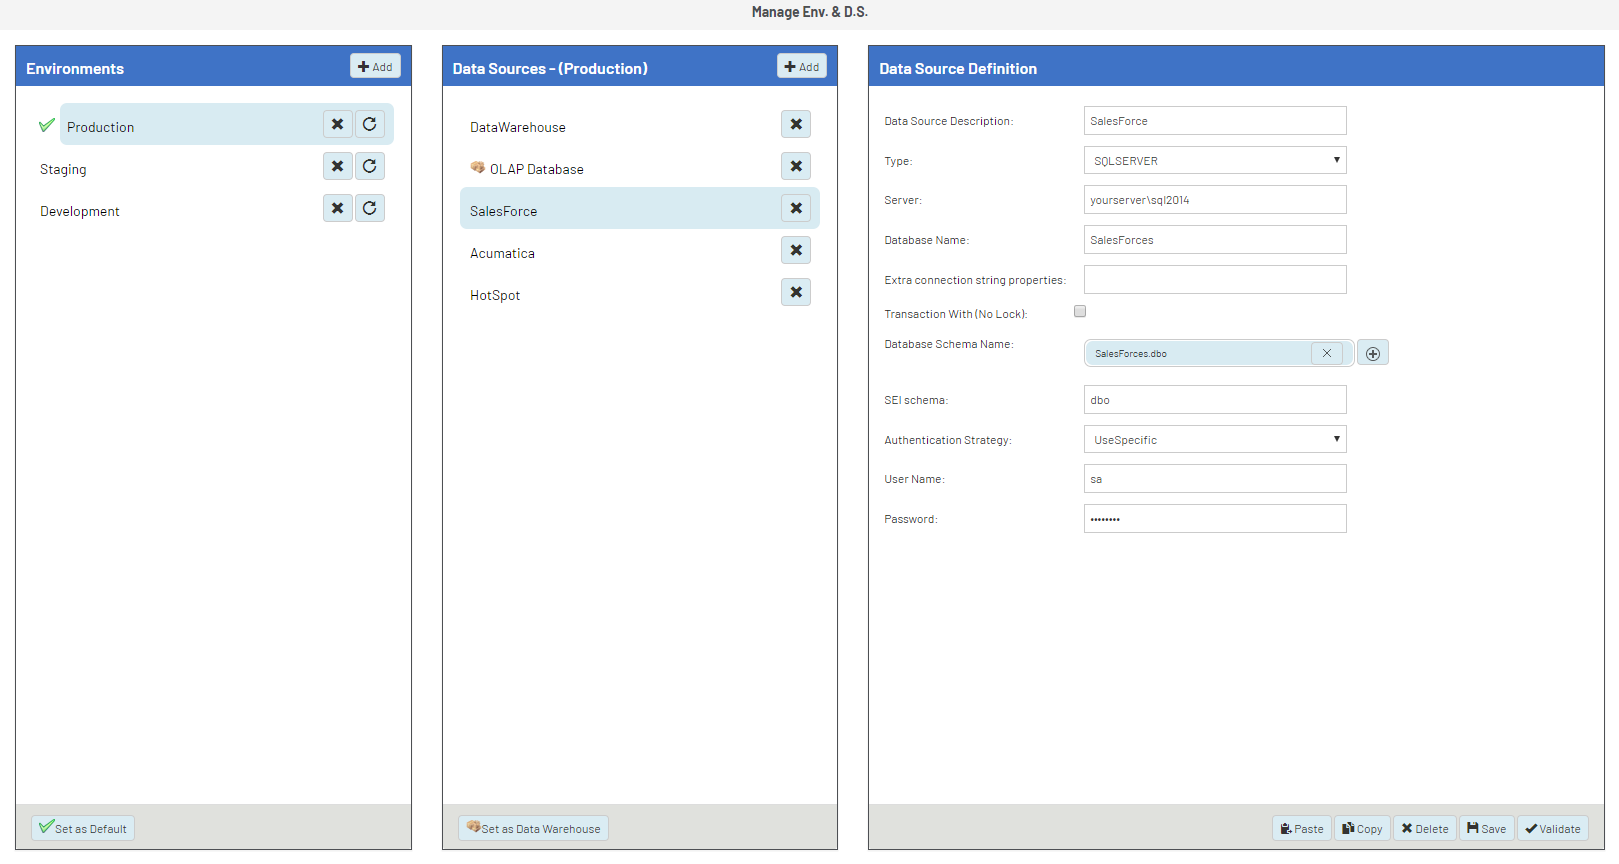
Configure the data source definition
Once you’ve added a data source, you need to define how it connects to your database.
-
In the Data Sources panel, select the data source you wish to configure.
-
The Data Source Definition panel will display editable fields.
-
Enter the required data source properties.
-
Click Save to apply your changes.
Set data warehouse option
If you intend to use a data source for OLAP cubes, you’ll need to designate it as the data warehouse.
-
In the Data Sources panel, select the relevant data source.
-
Click the Set as Data Warehouse button at the bottom.
-
Additional fields will appear for configuring:
-
Enter the Data Warehouse Schema. This typically matches the custom schema.
-
(SQL Server Only) Enable Use MARS during the cube loading to allow multiple active result sets for safer parallel queries.
-
Note: The default behavior before version 8.0.1 was to have MARS enabled. Learn more about this option here.

Data source definition properties
Snowflake specific data source properties
Snowflake is a fully managed, cloud-based OLAP database optimized for large-scale analytics and batch processing. It features independent scaling of storage and compute, automatic data partitioning, and high-performance parallel query execution.
To configure a connection to Snowflake, select Snowflake as the data source type. Dedicated Snowflake fields will appear in the setup page—complete these fields as described in the following table.
| Field | Description |
|---|---|
| Server | Snowflake account name. |
| Database Schema Name | Schema name only (no database prefix). |
| Authentication Strategy | For Key-Pair Authentication: Use your public/private keys if your source supports this method. |
| Key User, Key File, Key Password | The username, uploaded private key file, and optional password if the key file is protected. |