Settings for Google Sheets/Google Analytics
This page helps you set up the Google Sheets and Google Analytics connections.
The same procedure applies to these two connections. The only difference is that they use a different CallBack URL address.
Before starting, make sure that you have a Google account.
- In your Web browser, go to https://console.developers.google.com/.
- In the Email or Phone field, enter your email address or phone number and click on Next.
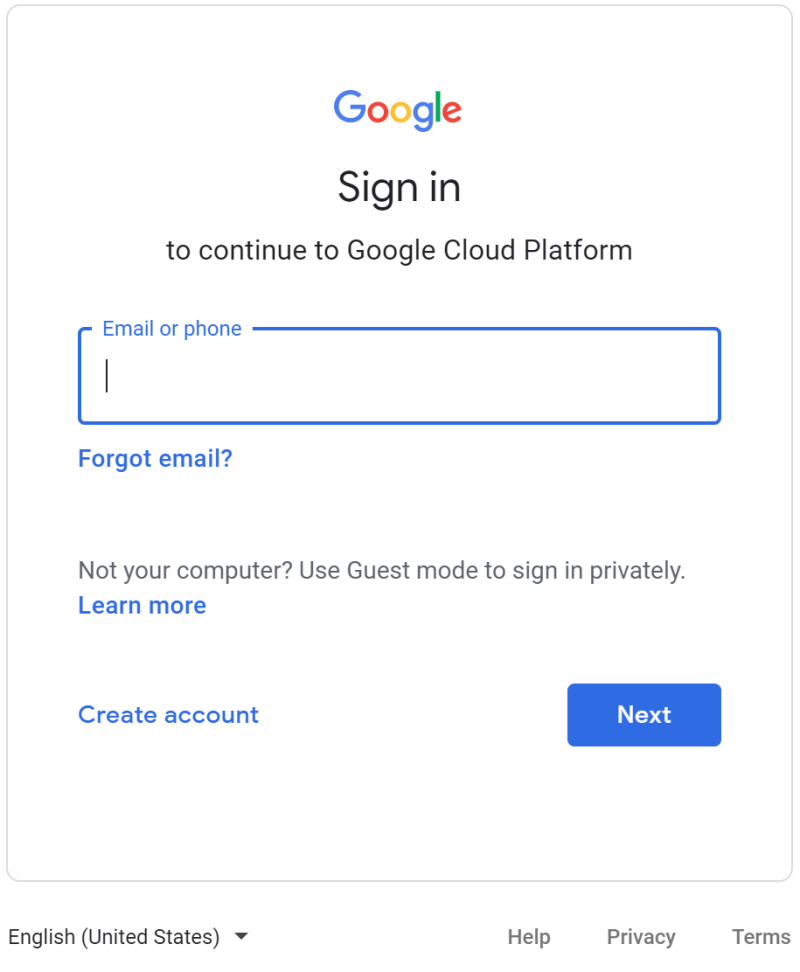
- Enter your password and click on Next.
- In order to use Google API, you must have at least one Project created. If you already have a Project, go directly to step 5. Otherwise do as follows:
- Once your project is selected, in the upper bar, click on Enable APIs and Services.

- In the API Library, use the Search Bar to select the API you want to enable:
- Use the Search Bar to find Google Drive, then click on it.
- Click on Enable.
The Google Drive API must also be enabled, or the following error message will be displayed:
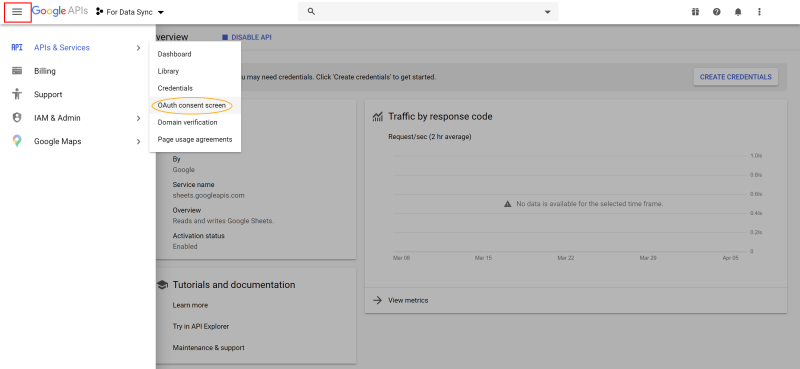
- In the upper-left hand corner click on the Navigation Menu, mouse over API &Services and select OAuth consent screen.
- Under the User Type section, select External and click on Create.
- On the OAuth consent screen:
- In the Application name field, enter a name for the application to better identify it in the list.
- Click on Add scopes to define the Permission Level you want to grant to this application.
- In the Authorized Domains field, enter the Data Sync server and your company domain.
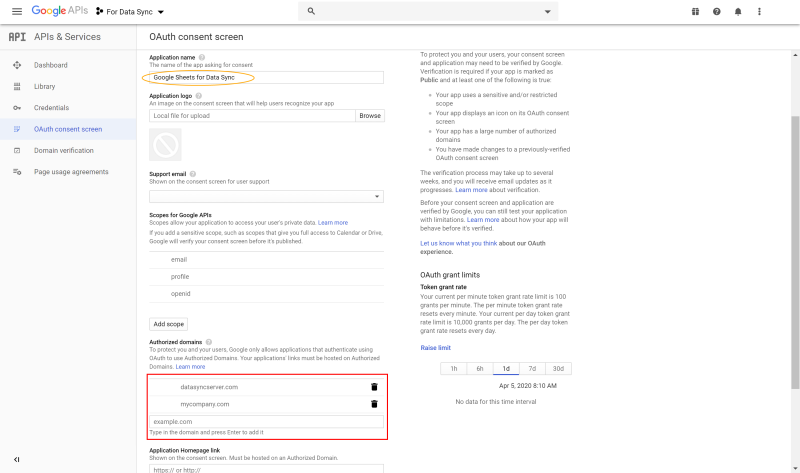
- At the bottom of the page, click on Save to finish.
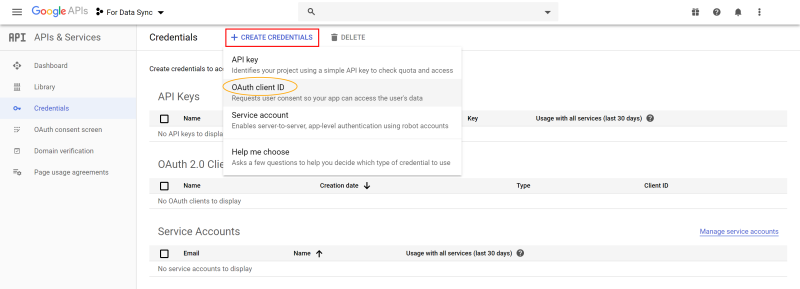
- In the left menu, click on Credentials.
- In the upper bar, click on + Credentials and select OAuth Client ID.
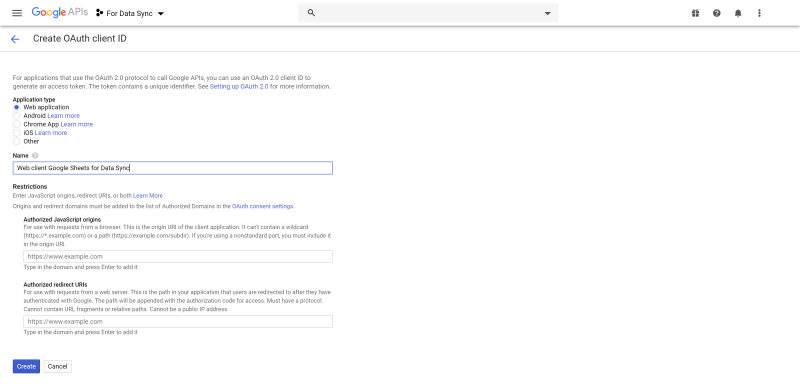
- In the Application Type section, select Web Application.
- Enter a name for the application to better identify it in the list.
- Define the Restrictions section according to your preferences and click on Create.
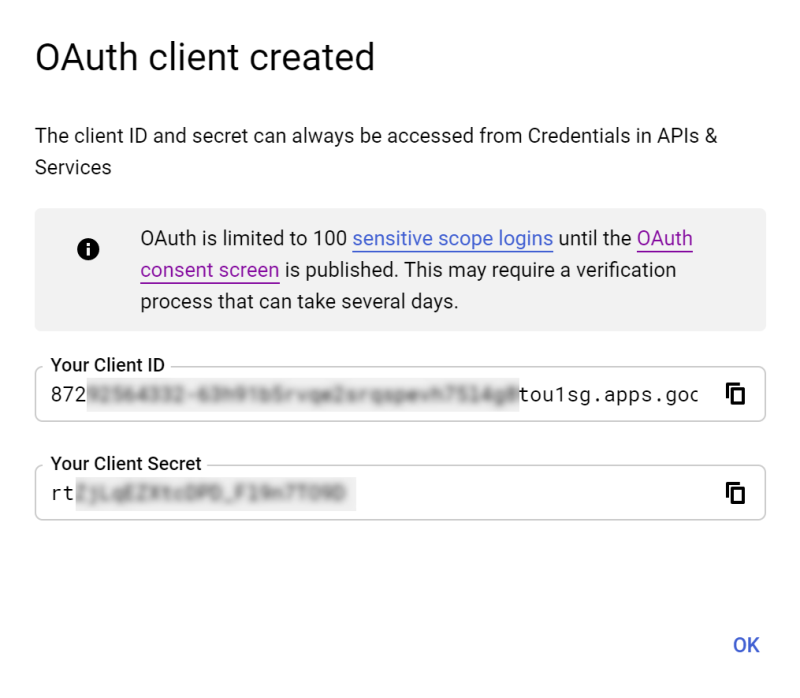
- Click on OK to close this window.
- Under the OAuth 2.0 Client IDs section, click on the Client you have created.
- In another browser tab, go to Data Sync and create a new Source Connection.
- In the list, select Google Sheets or Google Analytics.
- Copy the Callback URL address from the field in Data Sync.
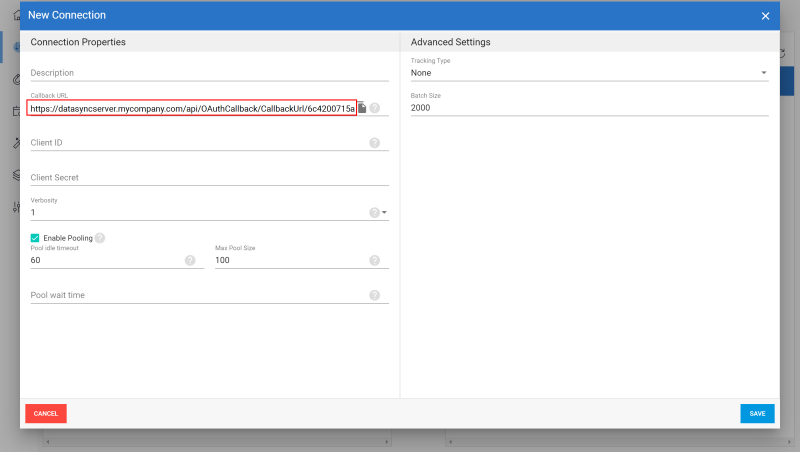
- Back to the Google API tab, under the Authorized redirect URI section, click on Add URI, and paste the Callback URL address into this field.
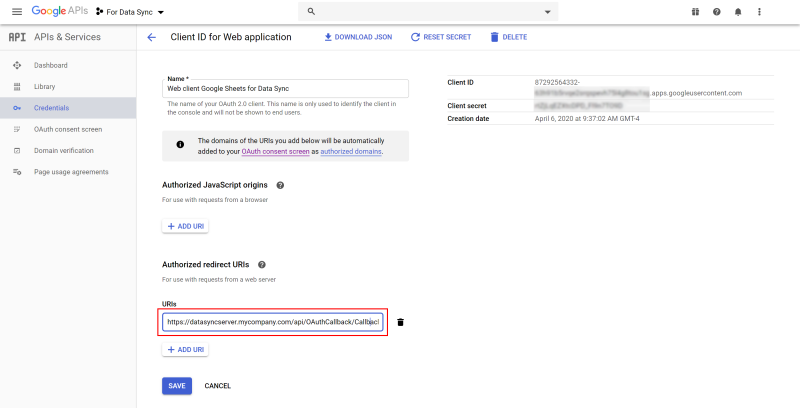
- In the right section, copy the content in the Client ID and Client Secret fields and paste it into their respective fields in Data Sync.
- Come back to the Google API tab and click on Save to finish the setting of this Client.
- Come back to the Data Sync tab, and in the Description field, enter a name for this Source connection. Change the other settings (Tracking type etc.) according to your preferences.
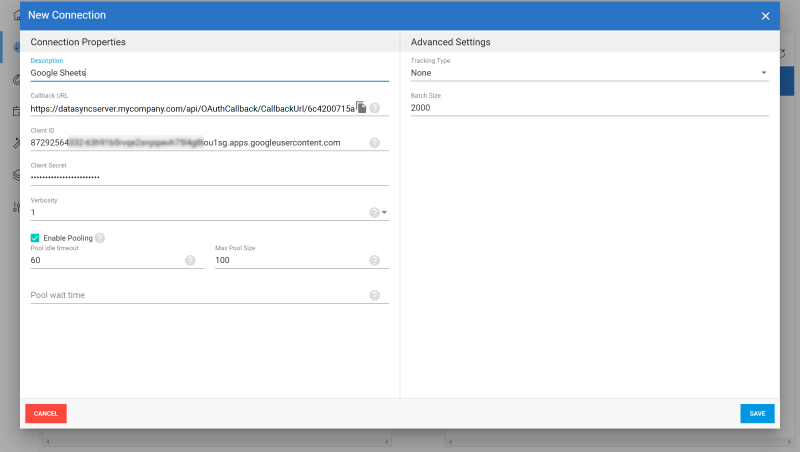
- Click on Save.
You will be directed to the Sign in with Google screen in order to authenticate this Source connection with the Google account you used to create the API.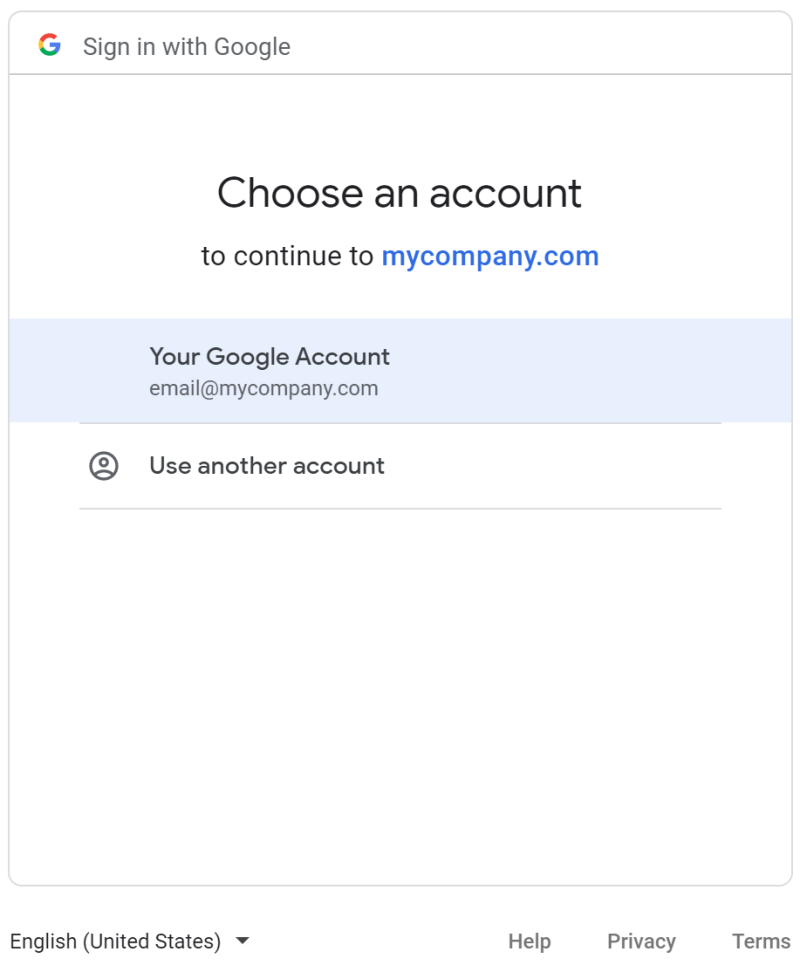
- Click on Allow to finish.
This window confirms that the Google Sheets/Google Analytics connection is successfully created.
Extraction with Google Analytics
Once you have also created a Destination connection (refer to Add a Source and Destination Connection for Google Analytics, you will need to Add an Extraction and Setup the Extraction Panel to retrieve data.
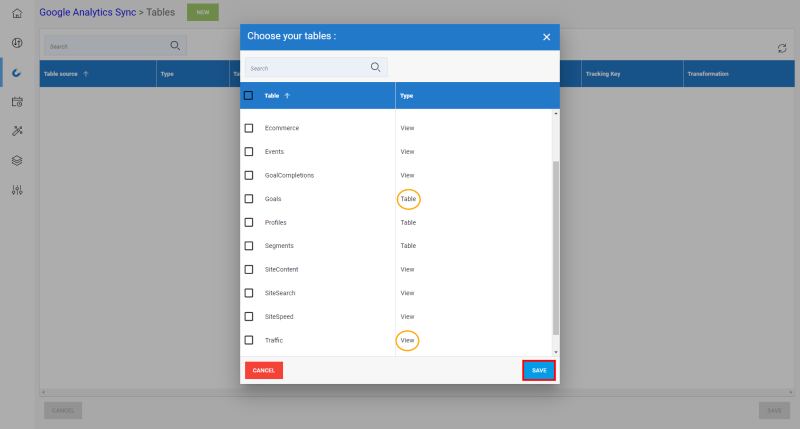
After clicking on Create, a pop-up window appears so that you can choose the Tables and Views you want to retrieve data from.
Regarding the Extractions, Google Analytics only allows up to 10 Metrics (Measures) and seven Dimensions in a single Query for View type tables.
When adding a View, all Columns are selected by default. In order to comply with the limitations imposed byGoogle, you need to make sure that a maximum of 10 Metrics (Measures) and seven Dimensions are selected.
- In the Tables list, click on the number under the Fields column to make your selection.
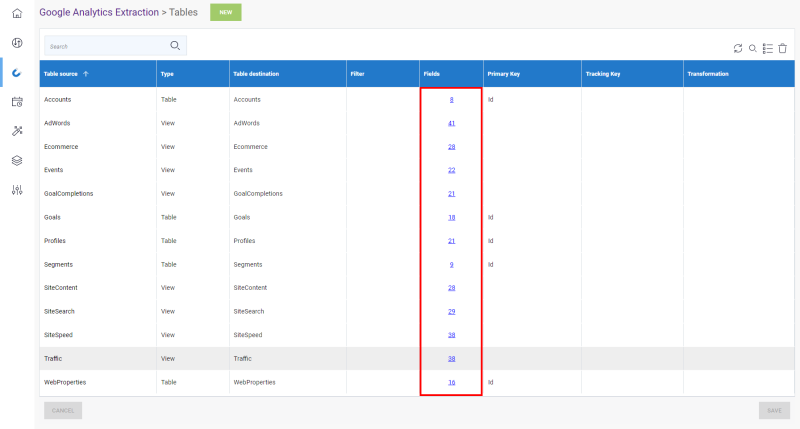
- Tick the Sync checkboxes of the Fields you want to use.
- Once you're done, go back to the Tables list.
For View type tables, a Filter specifying a date range needs to be set.
- In the Tables list, under the Filter column, click on the pencil icon on the row of a View type table.

- Enter the following Query as follows by replacing the mention 'DATE_VALUE' with values of a date range:
StartDate='DATE_VALUE' AND EndDate='DATE_VALUE'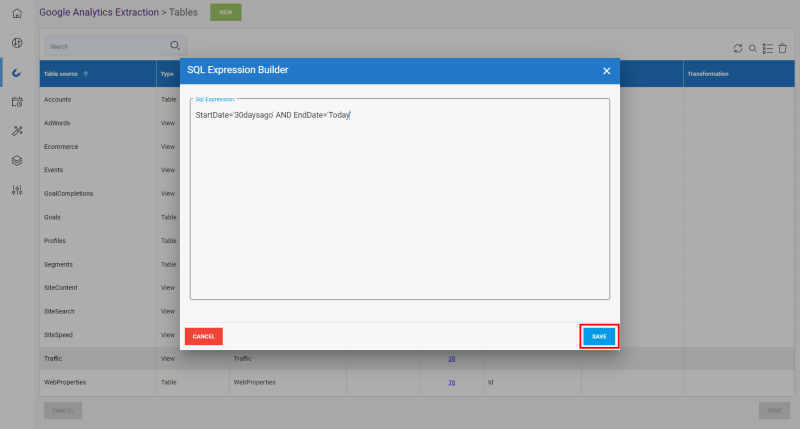
- Click on Save to finish.
For more information regarding the Queries and Responses of this API, please refer to the Google official website.


