Setting Up the Extraction
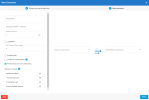
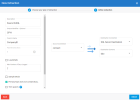
When you create an extraction, the New Extraction panel will show up for you to specify which source and destination connections should be used to perform the extraction.
-
Enter the required data as described below.
-
Click Create. You will automatically be directed to the Tables window.
For Acumatica:
- Both of the Source connections (one with tracking by Date and one without tracking (set to None) must use the same Destination connection.
- Each Company must be entered into the Column Name field with a different ID for each Tenant (Customer) in the Unique Identifier field (refer to the example below).
| Extraction Setting | Description |
|---|---|
| Extraction Details | |
| Description | Enter a name for your extraction. |
| Unique Identifier (Optional) |
This is used to differentiate entries with the same name coming from multiple sources in order to keep the data integrity in the destination rows. As an example, if you have 3 sources and in each of these 3 sources you got the same invoice number, in the destination they will be kept as a distinct rows with a specific unique identifier for each source. If for any reason you want to eliminate duplicates (ex: same customers in all the databases) you could put the same unique identifier and the system will delete the duplicates and keep the definition of the last update done by the last source. Important
The value you enter in the Column Name field must be the same for all the extractions you plan to consolidate as this column will be created and added to all tables. The data that will be inserted into this column is the value you entered in the Unique Identifier field. |
| Parallel Extractions | Set the number of extractions you want to process at the same time (the higher the value is the fastest the process takes but the highest resources will be required as multiple extractions will be run simultaneously.) |
| Active | This parameter appears when editing an extraction. Select this option if you want this extraction to remain active for a schedule. |
| Log Details | Select this option if you want a detailed log. Unlike the simple log, the detailed log includes each step of the process. |
| Max Number of Days Logged | Define the maximum number of days for which entries are saved in the extraction logs. The default value is 7 days but users can specify any value between 1 and 366. |
| Sample Mode | Select this option if you want to test the settings of your extraction. Only 50 records by table will be synchronized. |
| Primary Keys does not contain NULL | If enabled, DataSync will remove NULL logic from the WHERE clause when using the Process Deleted Record function (enabled by default). |
| Trim spaces | Removes space characters at the end of a string. |
| Unique Clustered Index | If enabled, DataSync will create a unique clustered index for SQL and Oracle (enabled by default). |
| Execution Timeout |
Specifies the wait time in minutes applicable per table on source and destination for Command and Connection timeout. The defaults values are:
|
|
Source and Destination Note
Some connections will not have a schema property (ex: mySQL, Excel, Access etc.). The available destination connection in the drop-down list will be affected by the type of extraction you chose. If you have selected Export, only CSV connection type will be available for instance. |
|
| Source Connection | Select a source connection in the drop-down list. |
| Source Schema | Select the schema associated to the source database. |
| Destination Connection | Select a destination connection in the drop-down list. |
| Destination Schema | Select the schema associated to the destination database. |

