Installing the SEI Server (Basic)
This topic describes the steps to install the SEI Server using the basic installation type. This installation type has fewer steps and is recommended for a simple architecture (single server or dedicated BI server). The server is installed with all its components (Application, Scheduler API, Distribution Worker and OLAP Worker). SEI is installed in single-tenant mode by default.
To perform the basic installation:
-
Run the SEI Server.exe on the server and click Next.
NoteYou might get a screen prompting you to install certain prerequisites if they are not already installed on the server. Click Install and they will be installed automatically.
-
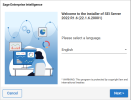
In the Welcome screen, select the desired language for the installation and click Next.
-
In the License Agreement screen, read the end user license agreement and click I Agree.
-
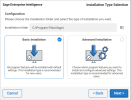
In the Installation Type Selection screen:
-
Enter or browse for the installation path.
-
Keep the default choice of basic installation.
-
Click Next.
-
-
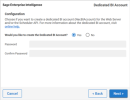
If the Dedicated BI Account is not created yet, the Dedicated BI Account screen is displayed:
-
If you want to create the Dedicated BI Account:
-
Select Yes.
-
Enter the password of the new dedicated BI Account in Password and Confirm Password.
-
Otherwise, select No.
NoteIf the NECBIAccount is created for the first time, restarting the server is necessary for Excel Add-in distribution to work.
-
-
Click Next.
NoteFor more information about the Dedicated BI Account, see the section Dedicated BI Account.
-
-
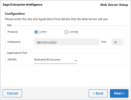
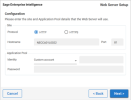
In the Web Server Setup screen:
-
Select the protocol.
-
If you select HTTPS, make sure that a certificate is already installed on the machine for this kind of IIS website. Select the certificate from the drop-down list.
-
Otherwise, select HTTP.
-
-
Enter the host name.
-
Enter the port. The default port is 81.
-
Select the type of account for the IIS application pool:
-
If you select Dedicated BI Account, enter the password if it was previously created on the machine. Nothing must be provided if it is being created.
-
If you select Custom Account, enter the username and the password of an existing user on the machine.
-
-
Click Next.
-
-
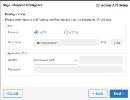
In the Scheduler API Setup screen, repeat the steps mentioned previously for the Web Server Setup screen.
-
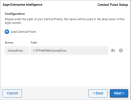
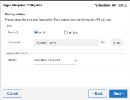
In the Central Point Setup screen:
-
Enter the name for the Central Point.
-
Enter or browse for the Central Point path. Make sure that the given path is a real path to a central point (if it is the case, it should contain a nec-centralpoint.xml file).
NoteAn unlimited number of Central Points can be added to the list of central points. Click + to add more Central Points.
-
Click Next.
-
-
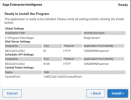
In the Ready screen, make sure that all the parameters are correct for the installation and click Install.
-
In the Installation screen, wait for SEI to be installed and ready for use. This may take a few minutes.
-
When the installation is completed, the Setup screen is displayed with a confirmation message.
-
Click Exit to close the installation wizard.
-
Click Browse SEI to open the application.
-
Click Save logs to save and view the logs if the installation was unsuccessful.
-
