Setting up SAML 2.0 with Okta for Excel Add-in
This topic provides step-by-step instructions on how to set up SAML 2.0 in Excel Add-in with Okta.
SAML Configuration in Okta
-
Create a developer account on the Okta website at https://developer.okta.com/signup/.
-
Click Applications on the menu.
-
Click Create App Integration.
-
Select SAML 2.0.
-
In the App name field, enter SAML 2 Excel.
-
Click Next.
-
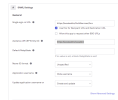
In the Single sign on URL field, enter https://exceladdin/ followed by /AuthServices/Acs.
-
In the Audience URI (SP Entity ID) field, enter https://exceladdin followed by a Unique Identifier.
For example, https://exceladdin/ssoaddin
-
Click Next.
-
Click Finish.
-
Select the Assignments tab.
-
Click Assign.
-
Add the SEI users who will be connecting with SSO.
Excel Add-in Configuration
Editing the EXCEL.EXE.config file
In order to fully benefit from Okta SSO functionality, you need to edit the EXCEL.EXE.config file.
You can find this file in these locations:
| Path | Office Version |
|---|---|
|
C:\Program Files (x86)\Microsoft Office\OfficeXX\ OR C:\Program Files (x86)\Microsoft Office\Root\OfficeXX\ |
32-bit |
|
C:\Program Files\Microsoft Office\OfficeXX\ OR C:\Program Files\Microsoft Office\Root\OfficeXX\ |
64-bit |
If you cannot find the EXCEL.EXE.config file in these locations, perform a search in the following directories depending on the Office version you are using:
-
C:\Program Files (x86)\Microsoft Office for the Office 32-bit version
-
C:\Program Files\Microsoft Office for the Office 64-bit version
| Attribute in EXCEL.EXE.config file | Value before change | Value after change | Comment |
|---|---|---|---|
| ssoMode | "None" | "Saml2" | Enable the SAML2 Single Sign-On mode |
| ssoSpEntityId | "https://exceladdin/SomeEntityId" | "https://exceladdin/ssoaddin" | Modify with the value entered in the Audience URI (SP Entity ID) field |
| ssoSpReturnUrl | "https://exceladdin/" | "https://exceladdin/" | Should never be modified |
| ssoServiceAddress | "http://localhost:4504" | "http://yourserver:4504" | Modify according to your BI Service address |
| ssoWebURL | "http://localhost:81" | "http://yourserver:81" | Modify according to your Web Client address |
| ssoNameAttribute | "USERNAME" | "http://schemas.xmlsoap.org/ws/2005/05/identity/claims/nameidentifier" | Modify according to your choice |
| ssoDefaultCentralPoint | "\\SERVER\CentralPoint" | "\\YOURSERVER\CentralPoint" | Modify according to your Central Point shared folder path |
| ssoIdpEntityId | "https://stubidp.sustainsys.com/Metadata" | "http://www.okta.com/exk3u61egp4YFC0F25d7" | This is the value you retrieved from the Identity Provider Issuer field |
| ssoModeSignOnURL | "https://stubidp.sustainsys.com/" | "https://dev-40198417.okta.com/app/dev-40198417_saml2excel_1/exk3u61egp4YFC0F25d7/sso/saml" | This is the value you retrieved from the Identity Provider Single Sign-On URL field |
| ssoSigningCertificateFileName | "stubidp.sustainsys.com.cer" | "okta.cert" | For the Full certificate name field, enter the name of the certificate you downloaded from Okta with the .cert or .cer extension |
Copying the Okta Certificate
-
Open the Excel.EXE.Config file.
-
Add the Okta certificate in the same folder as the Excel configuration file.
-
Configure the parameters as follows.
<add key="ssoMode" value="Saml2"/>
<add key="ssoSpEntityId" value="https://exceladdin/ssoaddin"/>
<add key="ssoSpReturnUrl" value="https://exceladdin/"/>
<add key="ssoServiceAddress" value="http://W2K12R2RD2:4504"/>
<add key="ssoWebUrl" value="http://W2K12R2RD2:81"/>
<add key="ssoNameAttribute" value="http://schemas.xmlsoap.org/ws/2005/05/identity/claims/nameidentifier"/>
<add key="ssoDefaultCentralPoint" value="\\W2K12R2RD2\CentralPoint"/>
<add key="ssoIdpEntityId" value="http://www.okta.com/exk3u61egp4YFC0F25d7"/>
<add key="ssoModeSignOnUrl" value="https://dev-40198417.okta.com/app/dev-40198417_saml2excel_1/exk3u61egp4YFC0F25d7/sso/saml"/>
<add key="ssoSigningCertificateFileName" value="okta.cert"/>
Creating Users and Groups in SEI
-
Refer to Users to create your Web Client. Enter the same values for User Name and ssoNameAttribute you defined during the configuration of your EXCEL.EXE.config file.
If you need to change a user connected with Single Sign-on, close Excel and clear your Internet Explorer 11 cache (refer to Microsoft Edge). This step is only required for Internet Explorer, as it is a Windows component and can access Windows cache. Other Web Browsers use their own cache.

