SEI DataSync
DataSync is required for Sage 100 North America
Doing this is also recommended if you do not want to query the ERP database that uses Live Data, and would rather query the copy of this database.
For Sage 100 North America Standard, you must use DataSync to perform a consolidation or a synchronization of the data.
Prerequisites
- A version of Sage 100 North America supported by Sage
- A destination database (preferably, in the same collation as your Sage 100 North America Database)
- A valid version of DataSync (refer to Installing DataSync for more information)
Set the Connections
Each database you want to consolidate needs two source connections:
- One with the Tracking Type set to Date
- One with the Tracking Type set to None
Unfortunately, not all Sage 100 North America Tables contain the DateUpdated and TimeUpdated fields, and for this reason, some Tables cannot be loaded incrementally. Fortunately, these Tables are often very small and do not pose a problem.
- Time Zone has to be set to the Sage 100 North America Application Server Time.
Settings for Sage 100 North America Premium
If you are using Sage 100 North America Premium, do as follows. If not, refer to Settings for Sage 100 North America Standard.
- Follow the procedure described in Adding a Source and Destination Connection to create a Source and a Destination connection.
You should have a result similar to this for the Source connection:

You should have a result similar to this for the Destination connection:

Settings for Sage 100 North America Standard
Unlike Sage 100 North America Premium, which runs on SQL Server, Sage 100 North America Standard uses the ODBC ProvideX driver. For this connection to work in DataSync, this driver requires specific configuration. You need to change the number of simultaneous connections in DataSync as follows:
- Go to the following path C:\inetpub\wwwroot\SEIDataSync\SyncAPI and open the appsettings.json file.
- In the fourth line, change the value "MaxNumberOfJobsRunningInParallel": "400" to "MaxNumberOfJobsRunningInParallel": "4" and save the file. Note that it will restrict all DataSync connectors to four parallel jobs. The DataSyncAPI application pool must be restarted for these changes to be applied.
In the ODBC parameters, you need the Directory, Prefix and ViewDLL values. These values are actually Shared Folder paths (Ex: \\YourServer\Sage\Sage100\…). By default, the Identity user setup on the four DataSync Application Pools is set to NetworkService, which does not have access to the Shared Folders. To access these Shared Folders, the Identity user will have to be modified by a user that has the authorization to access them. Here are the modifications that must be made:
- Press the Windows key + R to open the Run window.
- Enter inetmgr and press the Enter key.
- On the left pane, click on the little arrow to expand the connection.
- In the Application Pools tab, right-click on DataSyncAPIand select Advanced Settings....
- Under the Process Model section, click on the Identity field and change its value by clicking on the three dots.
- In the Application Pool Identity window, select Custom account and click on Set...
- In the Set Credentials window, enter the user name and password of the local administrator account and click on OK three times.
- Repeat the steps 4 to 7 for DataSyncIdentity, DataSyncJob and DataSyncSync.
- In DataSync, click on the Connections tile.
- In the upper left corner, click on New to create a new Source connection.

- In the list, select the ODBC.


Connection Properties Panel
- In the Description field, enter a name for this connection.
- Leave the Null Expression fields on their default values.
- Enter a single quote in the String Constant fields.
- In the section below, tick all the checkboxes except the Supports Schemas and Supports Subqueriesand checkboxes.
When adding an SQL Query instead of syncing a Table directly, unticking the Supports Subqueries checkbox before saving creates several limitations. After having imported the extraction template, refer to Sage 100 North America only if you want to add an SQL query.
- When ticking the Supports Quotes checkbox, tick only the Alias and Columns checkboxes.
- Enter a single quote in the Left Delimiter and Right Delimiter fields.
- Leave the other Fields on their default values.
- In the Meta Loading drop-down list, select From SELECT Statement.


Additional Connection Properties Panel
- Click on Add property to add the properties described in the table below:
| Property | Value | Example |
|---|---|---|
| Driver | {MAS 90 4.0 ODBC Driver} | |
| UID | [Sage 100 North America Username] | |
| PWD | [Sage 100 North America Password] | |
| Directory | [Sage MAS90 path] | \\[Server]\Sage\Sage 100 North America Advanced\MAS90 |
| Prefix | [Sage MAS90 path]\SY | \\[Server]\Sage\Sage 100 North America Advanced\MAS90\SY |
| ViewDLL | [Sage MAS90 path]\Home | \\[Server]\Sage\Sage 100 North America Advanced\MAS90\Home |
| Company | [Company Code] | ABC |
| LogFile | \PVXODBC.LOG | |
| CacheSize | 4 | |
| DirtyReads | 1 | |
| BurstMode | 1 | |
| StripTrailingSpaces | 1 | |
| SERVER | NotTheServer |
For more information about these settings, click here.
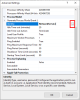
Advanced Settings Panel
- In the Tracking Type drop-down list, select Date.
-
Set the time zone to the Sage 100 North America Application Server Time.
You should have a result similar to this:

- Click Save to finish.
