Azure Single Sign-On for Web Client
Building on the previously explained Single Sign-On (SSO) procedure, this feature adds more security and convenience when signing on to SEI using Azure Active Directory (Azure AD).
This page helps you set up Azure so that it can work seamlessly with SEI.
First, configure the Azure Domain, as it will be from this platform that we retrieve the data required to correctly set up SEI.
Azure Domain Configuration
- In your Web browser, go to https://portal.azure.com/ and enter your login credentials (if required).
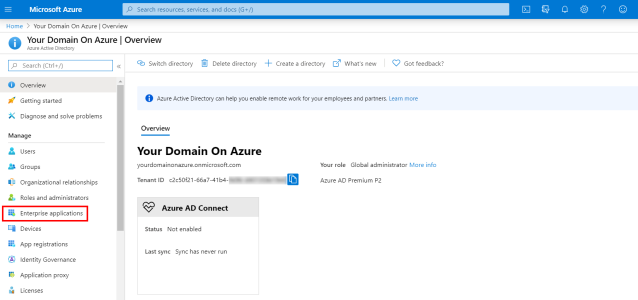
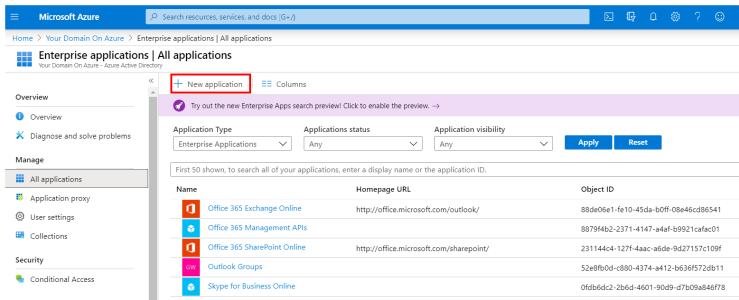
- In the left menu, click on Enterprise Applications.
- In the upper bar, click on + New application.
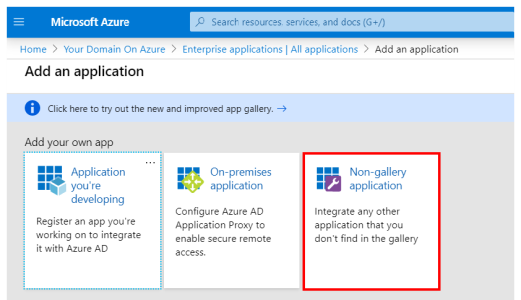
- Under the Add your own app section, select Non-gallery application.
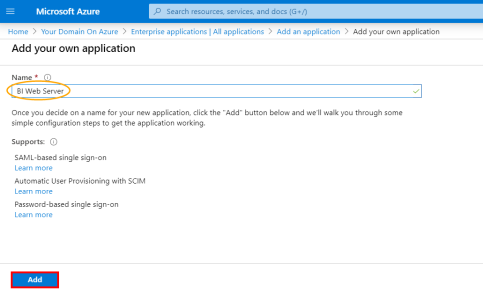
- In the Name field, enter a name for your application and click on Add.
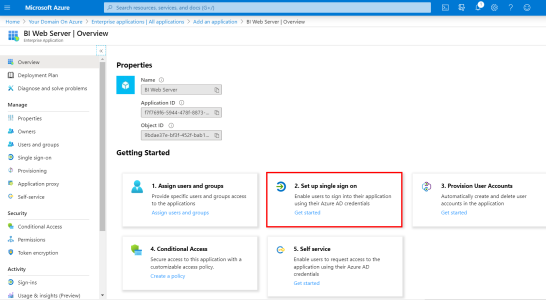
- Under the Getting Started section, select 2. Set up single sign on.
- Select SAML for the single sign-on method.
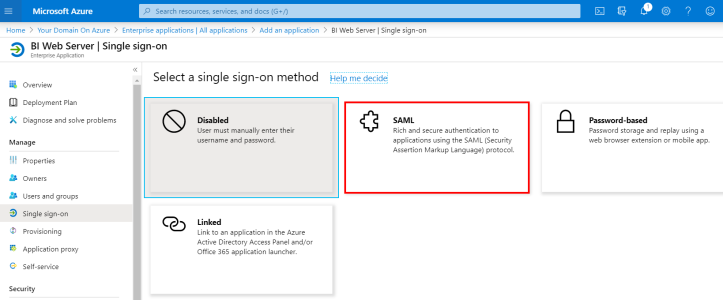
Although there are 5 sections for the SAML SSO method, you only need to set the following:
Download the Azure Domain certificate from the SAML Signing Certificate section and use the Set up BI Web Server section as a reference for the mapping of terms from the SEI Installation Package. This is explained in further detail in SEI Server Installation and Configuration.
Basic SAML Configuration
- In the upper-right corner, click on the pencil to edit the Basic SAML Configuration section.
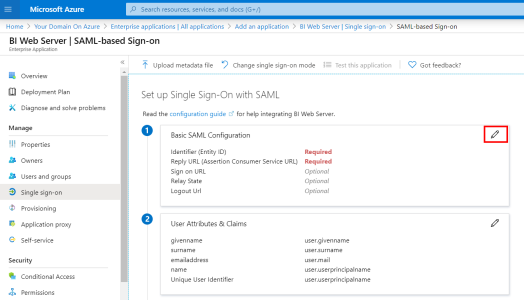
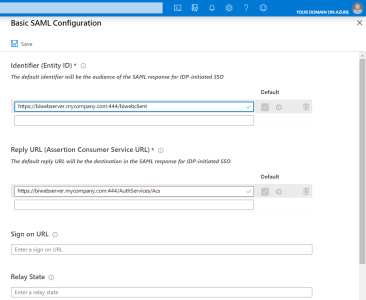
- In the Identifier (Entity ID) field, enter your SEI URL + :port following by a Unique Identifier for your Azure Domain.Important
Only for users who never did the https binding for external access: Take note of URL address used for the Web Client on your certificate to communicate with the Azure Domain. This will be explained in further detail in SEI Server Installation and Configuration.
- In the Reply URL (Assertion Consumer Service URL) field, enter your SEI URL + :port following by /AuthServices/Acs.
- Click on Save to apply changes.
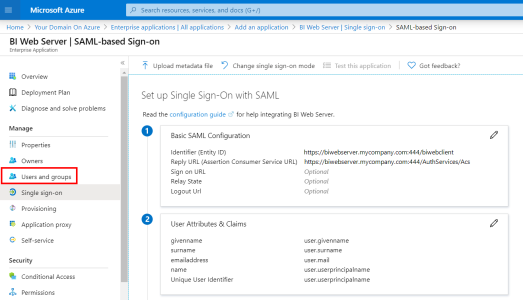
- In the left menu, under the Manage section, click on Users and groups.
- In the upper bar, click on + Add user to add the Users and Groups you want authorized to use SSO.
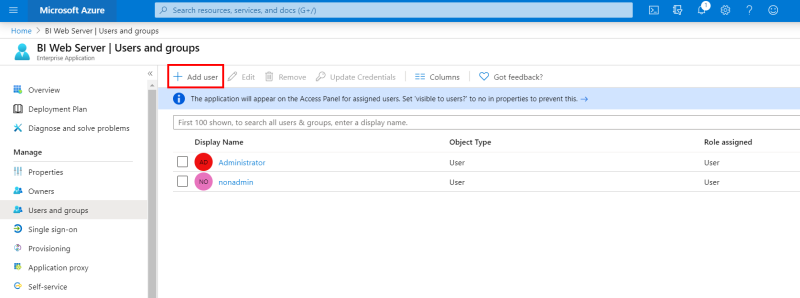
- This completes the Basic SAML Configuration section.
User Attributes & Claims
The installation package for the configuration of the SEI application automatically fills in the SAML2 answer's Attribute for user name field with the mailnickname attribute by default.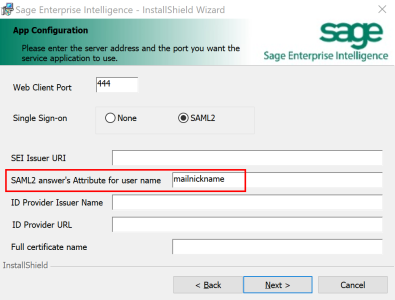
For users installing the SEI Web Application for the first time: Please note that the screen above will be covered in more detail in SEI Server Installation and Configuration.
For Azure Domain, you can replace this value with one of the attributes listed in the User Attributes & Claims section.
If you want to use the mailnickname attribute (because you want to choose the part of the email address before the @ sign), you will have to create it, since this attribute does not exist by default in Azure Domain.
Pour ce faire :
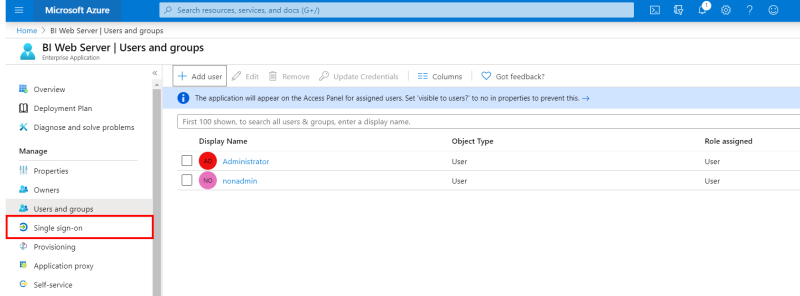
- In the left menu, under the Manage section, click on Single Sign-On.
- In the upper-right corner, click on the pencil to edit the User Attributes & Claims section.
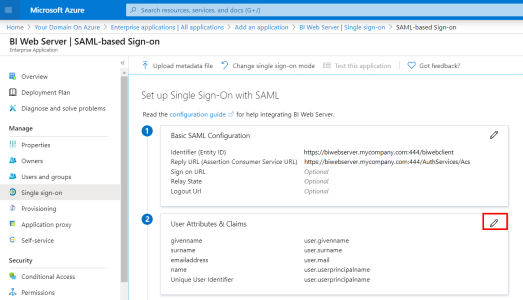
- Click on + Add new claim.
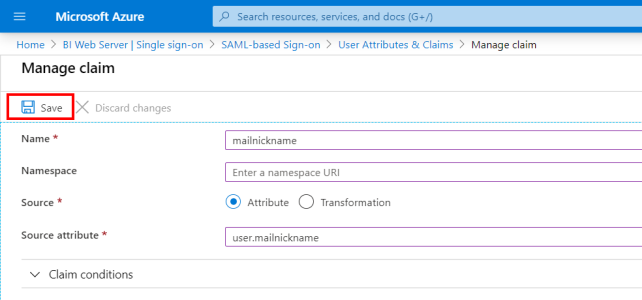
- In the Name field, enter mailnickname.
- For the Source, select Attribute.
- In the Source Attribute field, enter user.mailnickname and click on Save to finish.
SEI Server Installation and Configuration
Before starting the SEI Server Installation / Configuration, retrieve the certificate from Azure Domain.
Pour ce faire :
- Scroll to the SAML Signing Certificate section and click on Download next to the Certificate (Base64) field.
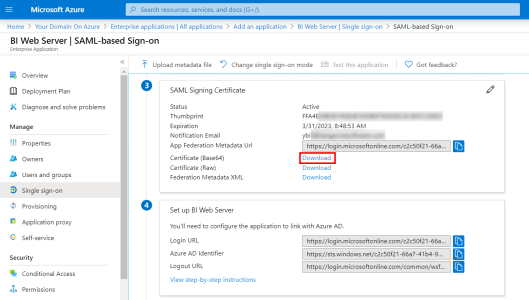
If SEI is already installed, go directly to Binding the Web Client. Otherwise, follow the procedure below.
For a First-Time Installation of SEI
- Follow the procedure described in Installer l'Application Web et la Distribution until Step 11 then fill in the fields according to the settings described in this section.
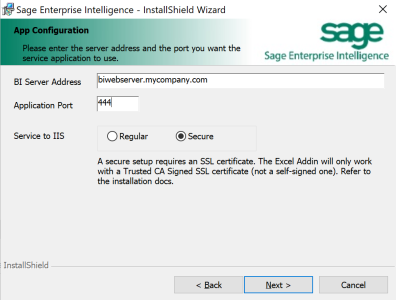
- For the screen below, fill in the fields as described.
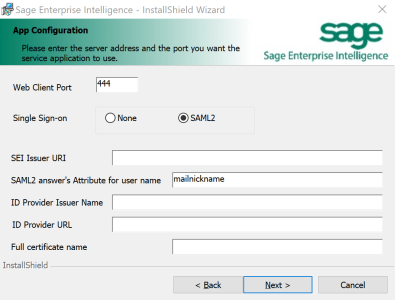
This mapping with SEI terms in the installation package is based on the Basic SAML Configuration and Set up BI Web Server sections in Azure Domain.
|
Terms in SEI Installation Package |
= | Terms in Azure Domain | Value used as example in this document |
| SEI Issuer URI | = | Identifier (Entity ID) | https://biwebserver.mycompany.com:444/biwebclient |
| ID Provider Issuer Name | = | Azure AD Identifier | https://sts.windows.net/c2c50f21-66a7-xxxx-xxxx-xxxxxxxxxxxx/ |
| ID Provider URL | = | Azure Login URL | https://login.microsoftonline.com/c2c50f21-66a7-xxxx-xxxx-xxxxxxxxxxxx/saml2 |
- For the Full certificate name field, enter the name of the certificate you downloaded from Azure Domain with the .cer extension (for example: AzureBIWebServer.cer).
- Vous devriez obtenir un résultat similaire à celui-ci :
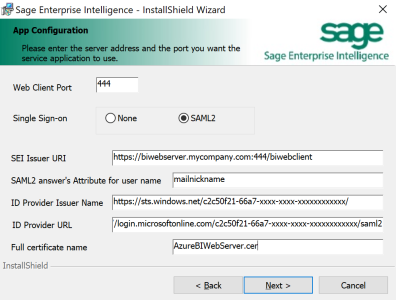
- Click on Next and finish the installation.
Binding the Web Client
By adding an https binding to your Web Client through this procedure, external connections will also be secured.
Pour ce faire :
- Press the Windows key + R to open the Run window.
- Enter inetmgr and press the Enter key.
- On the left pane, click on the little arrow to expand the connection.
- In the Sites tab, right-click on WebClient and select Edit Bindings...
- In the Site Bindings window, click on Add...
- In the Type drop-down list, select https.
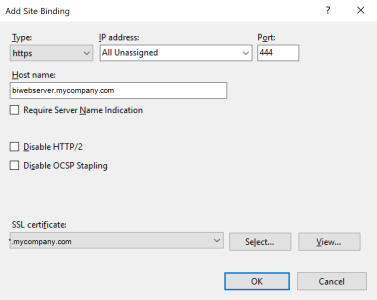 Note
NoteFor this https connection, we are using port number 444 but feel free to customize it according to your preferences.
- Click on OK to finish.
Vous devriez obtenir un résultat similaire à celui-ci :
Editing the web.config file
In order to fully benefit from Azure SSO functionality, you will have to edit the web.config file located in C:\inetpub\wwwroot\WebClient.
- Make sure the entityID attribute from the sustainsys.saml2 tag has the same value you defined in the Identifier (Entity ID) field in the Basic SAML Configuration section. In this document we set "https://biwebserver.mycompany.com:444/biwebclient" as value.
- Once open, change the other values in the web.config file as described in the table below:
| Attributes to be changed in SEI web.config file | Value before change | Value after change | Comments |
| returnUrl | "http://biwebserver.mycompany.com:444/Account/SSO" | "https://biwebserver.mycompany.com:444/Account/SSO" | We added a s to http since we want this connection to be secured. |
| entityID from the identityProviders tag | "https://stubidp.sustainsys.com/Metadata" | "https://sts.windows.net/c2c50f21-66a7-xxxx-xxxx-xxxxxxxxxxxx/" | This is the value you retrieved from the Azure AD Identifier field in the Set up BI Web Server section |
| signOnUrl from the identityProviders tag | "https://stubidp.sustainsys.com/" | "https://login.microsoftonline.com/c2c50f21-66a7-xxxx-xxxx-xxxxxxxxxxxx/saml2" | This is the value you retrieved from the Azure Login URL field in the Set up BI Web Server section |
Web Browsers have updated their policy regarding Cookies and these changes must be applied to your Web Client if you want SEI embedded into your ERP website, or use Single Sign-On (SSO).
| Attributes to be changed in SEI web.config file | Value before change | Value after change |
| cookieSameSite | |
|
| httpOnlyCookies / requireSSL / sameSite | |
|
Vous devriez obtenir un résultat similaire à celui-ci :
| Regarding the Web Client | |
| Regarding the Cookies | |
Steps after the Installation/Configuration
Copying the Azure Domain Certificate
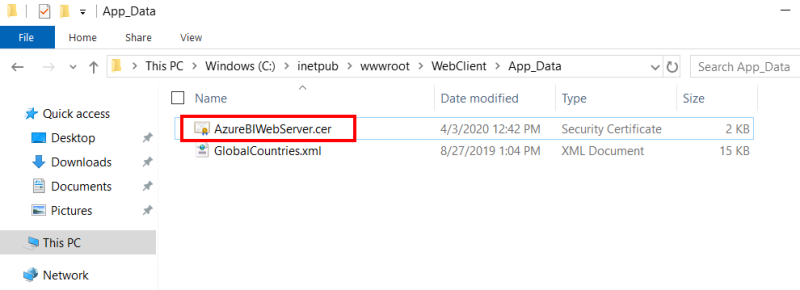
- Copy the certificate you downloaded from Azure Domain and paste it to C:\inetpub\wwwroot\WebClient\App_Data.
Creating Users / Groups in SEI
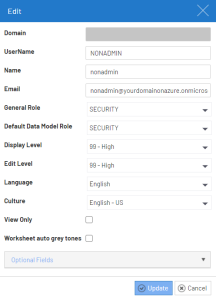
- Refer to Utilisateurs to create your Web Client user by entering the same value for User Name and SAML2 answer's Attribute for user name you defined during the installation of the package.
Accessing SEI with Azure SSO enabled
To log in with SSO enabled, simply use your default Web Client URL: https://biwebserver.mycompany.com:444.
If your Admin account is not set up with SSO and you need to log in, you can use this special URL to log in with your default credentials (without SSO): https://biwebserver.mycompany.com:444/Account/Login.
