Budget Workflow
Configuring the Budget
You first need to create a Budget configuration before being able to create the budget. This configuration allows you to determine the level of detail you want to apply to the budget.
- In the Data Models and Views tab, expand the folders Universal Data Model > Financial Budgeting and Sales Forecast > Budget Module.
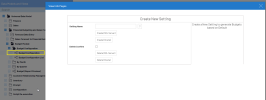
- Right-click the Budget Configuration data model and select View Info Pages.
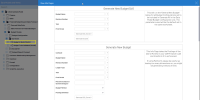
- Under the Create New Setting section, in the Setting Name field, enter a configuration code to identify the budget.
-
Click Create to finish.
-
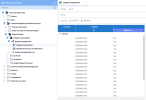
Open the Budget Configuration worksheet to define the level of details. Choose which dimension you want to budget on by changing the values from Yes to No in the Based on column.
DIMENSION01 to DIMENSION20 are the usual fields on the UDM Finance cube. They can be defined by users within the ERP or the analytical dimension can be mapped into those fields with UDM configurations.
-
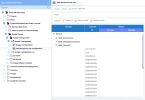
Open the Data Restriction per Configuration worksheet to define how you want to limit your data for this Budget Configuration. You can use multiple budget configurations to create one budget. For example, you can use the first configuration to keep Dimension 01 and Dimension 02 for accounts 4XXXX and the second configuration to keep Dimension 03 and Dimension 04 for the other accounts.
TipTo restrict your data more easily, you can use special syntax to select more than one value at a time:
-
* is an infinite wild card (e.g.: 4* in ACCOUNTID means all accounts that start with 4);
-
? is a single wild card (e.g.: 4?000 in ACCOUNTID means accounts 40000, 41000, etc.);
-
: defines a range (e.g.: 40000:49999 in ACCOUNTID means all accounts between 40000 and 49999.
Note: The range is applied by characters strings so even strings that are more than 5 characters long will be included, such as 4567890.
NoteThe Account Group (ACCOUNTGRP) includes the groups that were created for the Report Builder. All accounts that are included and published will be used in the filter.
-
-
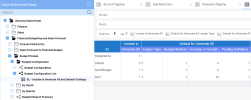
Expand the Budget Configuration List data model and open the GL - Include in Generate All and Default Settings worksheet. Configure the parameters that must be included in the Generate New Budget (All) info page. Please look at the next section for more details on the parameters.
Creating the Budget
You can create the budget using two levels of detail for the time period: per month or per quarter.
- In the Data Models and Views tab, expand the folders Universal Data Model > Financial Budgeting and Sales Forecast > Budget Module.
-
Expand the By Month or By Quarter folder depending on which type of budget you want to create.
- Right-click the appropriate Budget in Work data model and select View Info Pages.
-
These info pages use the 12 months that precede your first period and puts Last Year’s Opening Balance before the first period, Posting and Ending Balance of those 12 months.
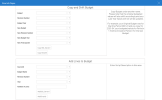
The first option is to use the Generate New Budget (All) section. This will run the Generate Budget Stored Procedure for all parameters set to 1 in the GL - Include in Generate All and Default Settings worksheet.
The second option is to use the Generate New Budget section to customize your budget:
-
In the Config ID field, click the Prompt icon (the question mark) to select the Setting Name you defined in Configuring the Budget.
-
In the Budget Name field, enter a name for the budget.
-
In the Revision Number field, enter the appropriate version number assigned to this budget.
-
In the Ledger Type field, select the calendar and currency you which to use. 1 is the default value if you did not use our UDM Ledger Type logic to define a new calendar and a new ledger currency to consolidate the different companies. Sage X3 users can use other Ledger Types from their system if they wish.
-
In the Year field, enter the fiscal year you wish to budget on.
-
In the First Period field, enter the first fiscal period of your budget (1 to 12 months or 1 to 4 quarters).
-
In the Percent Increase field, enter the increase or decrease percentage from last year to be applied to the budget, depending on the budget method you select below.
-
In the Budget Method drop-down list, specify the method you wish you use to transform last year’s data:
-
1 - % Increase on Last Year Posting is a % increase on Last Year’s amounts.
-
2 - 0 Posting Budget keeps the Opening Balance and Last Year’s Posting and Ending Balance but all budgeted Postings are at 0 and all Budgeted Ending Balances are the Opening Balance.
-
3 - % Increase on average of Last year Posting calculates the average of Last Year’s Postings and adds a percentage to it.
-
4 - % Growth on average of Last year Posting calculates the average of Last Year’s Postings and adds a monthly growth to it. If the average is 1000 and the growth is 8%, Month 1 is 1000 * 1.08, Month 2 is 1000*1.08*1.08, etc.
-
5 - No data, all combinations with 0 Posting is when you have no data. This creates a Cartesian plan of all the possible combinations; this might generate hundreds of millions of rows if you have too many dimensions. Limit your dimensions and data as much as possible when using this option.
-
-
In the Posting Definition drop-down list, select how you want your postings to be defined:
-
1 - Postings: Postings use average rates. This is only useful if you have used our UDM Ledger Type logic which applies a different exchange rate on those measures.
-
2 - Ending Balance -Opening Balance: Ending and opening balances use closing rates.
-
-
-
Click the Generate button of your server in the appropriate section (all or the individual one).
Reviewing the Budget
Once you have generated a budget, you need to review the budget data.
To edit your budget:
-
Under Budget in Work, open the Data Entry by Posting or Data Entry by Ending Balance worksheet based on your posting definition.
-
Edit the values as you deem fit. Note that data entry in UDM is retroactive:
-
If you update your Opening Balance and your Postings, your Ending Balances will be re-calculated automatically based on those when you save the data.
-
If you update your Ending Balances, your Postings will be re-calculated automatically based on the Opening Balance and Ending Balance.
Avoid bringing the Posting and Ending Balances fields under one worksheet because the view may become confusing when you refresh to see the changes. You can also use the reports built with the Report Builder functionality for the layout if you wish to see it as an Income Statement or Balance Sheet while doing data entry.
NoteIf your accounts are in multiple sections in the report, the numbers of the other sections will not get updated until you click Save Changes and refresh the worksheet.
-
-
Once data entry is done, click Save Changes.
Adding Lines to the Budget
This functionality allows you to add empty lines to your budget if you have new accounts that were not there last year. You might have to bring down the Fields in Groups to Columns to be able to fill them up. You can also use Budget Method 5 if those accounts are already loaded into UDM Accounts and Subaccounts.
- In the Data Models and Views tab, expand the folders Universal Data Model > Financial Budgeting and Sales Forecast > Budget Module.
-
Expand the By Month or By Quarter folder depending on which type of budget.
- Right-click the appropriate Budget in Work data model and select View Info Pages.
-
Under the Add Lines to Budget section:
-
In the SourceID field, click the Prompt icon (the question mark) to select the Setting Name you defined in Configuring the Budget.
-
In the Budget Name field, enter or select the name of the budget you created in Creating the Budget.
-
In the Revision Number field, enter the appropriate revision number assigned to this budget.
-
In the Year field, enter the appropriate year for the budget.
-
In the Number of Lines field, enter the number of lines you wish to add to the budget.
-
-
Click the Add button of the appropriate server.
Sending the Budget for Evaluation
-
Once you have reviewed your budget data, you can send your budget to validation. Right-click the Budget in Work data model and select View Info Pages.
-
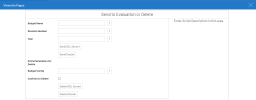
Use the Send for Evaluation or Delete info page to send your budget to another user for evaluation.
-
The budget is then moved to the Budget To be Validated (Period) data model from which the reviewer can evaluate the data. Once finished, the reviewer can use the info page to Accept, Reject, or Delete the budget. If rejected, the budget will be sent back to the Budget in Work (Period) data model.
Even if a budget has been validated, it can still be rejected through the Reject, Accept or Delete info page.
Once validated, budgets can no longer be edited unless they are rejected by a reviewer. Until then, if minor adjustments are necessary, you can make them via the Budget to be Evaluated (Period) worksheet. However, please note that a higher level of security is applied to that worksheet (30 by default).
Refreshing the Finance Cube
Once a budget has been validated, you must refresh the #3 - UDM Finance cube or execute a Load All operation. You will then be able to compare the budget with your actuals.
