Installing SEI in HTTPS
Uninstalling any previous version (if required)
If you already have installed SEI, you will have to uninstall it.
Before uninstalling, check the port number of the BI Service because it may not be the same as the one we will use (4504) in this the Installation process (refer to Installing SEI for more details). If the port number is different, you will get blocked by the firewall. In order to do so:
- Go to C:\Program Files\SEI\Sage Enterprise Intelligence\Service\objserver and open the BI Service.NetInstaller.exe.config file.
- Check the port number at the <baseAddresses> tag in order to reuse it for the installation.
- Go to Control Panel > Programs > Programs and Features.
- Select Sage Enterprise Intelligence and click Uninstall.
- Follow the wizard to remove the software.
Binding the Central Point Configurator
Before doing this process, make sure with the customer that the bindings (Central Point Configurator and Web Client) have been done on his network (DNS) ( = link in the Hosts file the Host name address from the certificate for the Web Central Point to his IP address).
- Press the Windows key + R to open the Run window.
- Enter inetmgr and press the Enter key.
- On the left pane, click the little arrow to expand the connection.
- In the Sites tab, right-click CPConfigurator and select Edit Bindings...
- In the Site Bindings window, click Add...
- In the Type drop-down list, select https.Note
By default, the port number for https connection is 443. Leave it to the default value.
- In the Host name field, enter webcp.*domain name from the certificate* if it's a wildcard certificate otherwise the Host name must be the same as one of the name(s) within the authorized list (refer to Installing SEI in HTTPS for more details).
- In the SSL certificate drop-down list, select the certificate you installed earlier and OK.
-
Back to the Site Bindings window, select the http line ad click Remove.
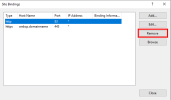
- Click OK to confirm and then Close.

Binding the Certificate
- Press the Windows key + R to open the Run window.
- Enter powershell and press the Enter key.
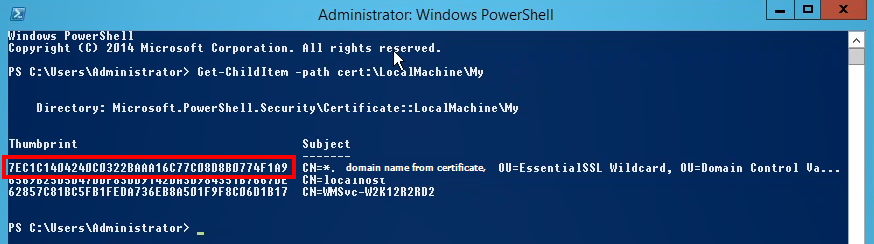
- Copy and paste this command and press the Enter key:
Get-ChildItem -path cert:\LocalMachine\My -
Copy the Thumbprint of your certificate (it's the first line) and paste it to a notepad.

- Back to the PowerShell window, copy and paste this command and press the Enter key:
netsh http add urlacl url=https://+:4504/ user="EVERYONE" - Copy and paste this command to a notepad (the same notepad where you put the thumbprint):
netsh http add sslcert ipport=0.0.0.0:4504 certhash=afabc3fe7f3eb1ce420ba02065e57f74652d631 appid={00000000-0000-0000-0000-000000000000} - Replace the value of the certhash ("afabc...31) with the Thumbprint ('7EC...A9 in this case).
- In the PowerShell window, enter netsh then press the Enter key.
- Enter http then press the Enter key.
-
Paste the rest of the command line ( add sslcert... 0}) and press the Enter key.
 Note
NoteYou need to break this command line like this otherwise it won't work like shown in the screen capture below.


Installing SEI
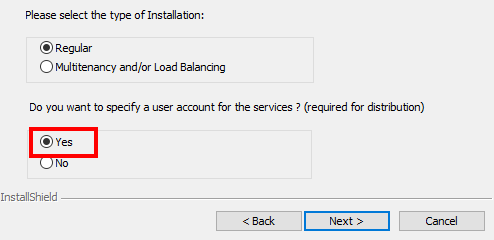
- Run the application SEI - Server - Win64.exe and click Next.
-
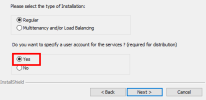
For the question Do you want to specify a user account for the Services, select Yes and click Next.
- For the BI Service User Account, enter the credentials of the local administrator and click Next.
- In the Path field for the Central Point Configuration, enter the address where is located the Central Point folder.
- In the Name field, enter the name you want and click Next.
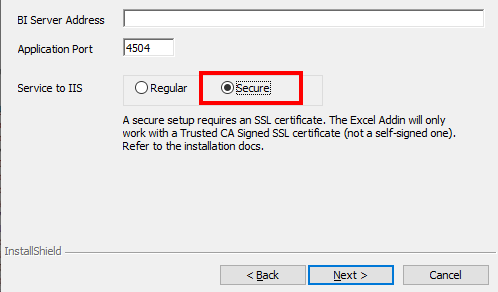
- In the BI Server Address field, enter one of the name authorized by the certificate or specify a name while using the domain provided by the certificate if the certificate is a Wildcard type (refer to Installing SEI in HTTPS for more details).
- In the Application Port, reuse the same port that was reserved for the BI Service during the preivous installation (refer to Uninstalling any previous version (if required)Note
By default, the port number is 4504.
-
Select Secure and click Next.

- In the Web Client Port field, leave it to 81 (as the port 443 is already used by the Central Point Configurator.)
- For the BI Distribution Configuration, enter the credentials of the local administrator and click Next.
- Click Install.Note
If you receive the error below:
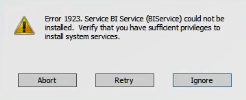
- Open the Task Manager (Ctrl+Alt+Del keys) and go to the Details tab.
- Select BI Service.NetInstaller... in the list and click End task.
- Click End process to confirm.
- Back to the error message box, click Retry.

- Click Finish.
Binding the Web Client
- Press the Windows key + R to open the Run window.
- Enter inetmgr and press the Enter key.
- On the left pane, click the little arrow to expand the connection.
- In the Sites tab, right-click Web Client and select Edit Bindings...
- In the Site Bindings window, click Add...
- In the Type drop-down list, select https.
- Leave the port number to 443.
- In the Host name field, enter the name that will be used to get access to SEI (it can be SEI.*domain name from the certificate* if it's a wildcard certificate otherwise the Host name must be the same as one of the name(s) within the authorized list (refer to Installing SEI in HTTPS for more details).
- In the SSL certificate drop-down list, select the certificate you installed earlier and click OK.
- Back to the Site Bindings window, select the http line ad click Remove.
- Click OK to confirm and then Close.
- Go to C:\Program Files\SEI\Sage Enterprise Intelligence\DistributionService\objDistribution\ and open the DistributionInstaller.exe.config file.
- Look for the "<add key=WebAppUrl" tag and value.
- Add an "s" to http.
- Change the port number 81 to 443 and save.
- You must also update your cookie management settings in order to complete the binding. For more information on that process, please see Cookie Management.
Completing the steps outlined above will prevent any HTTP connection from working with your Web Client. For example, that would be a problem for setups that use HTTPS for external access and HTTP for internal access.
Updating Excel Add-In
As you apply some changes to secure the services (BI Services etc), you need to update the Excel Add-In in order to reuse it.
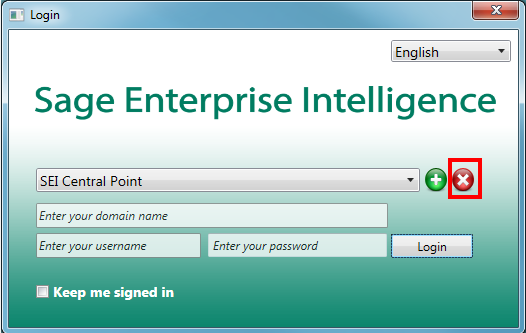
- In the Login box, click the red cross icon to remove the selected Central Point.

- Click the plus sign icon.
- In the Add a Central Point window, in the Central Point Path field, enter the address where is located the Central Point folder.
- In the Service Address field, enter the same name (address) that you use as Host name during the binding of the Web Client (refer to Binding the Web Client) and add :4504 (4504 = the port used for the BI Service in this case).
- In the Web URL field, enter the same address you use for the Service Address field but instead of :4504, use :443.
- Click Add.
- Once the Central Point is added, sign in with your credentials and click Login.