
Managing Indexes
As of Release 2021 R2.1, DataSync allows you to manage the creation, update, and deletion of indexes in the destination table based your extractions. Indexes are automatically created when retrieving source tables. While indexes improve the performance of selections and joins, they take additional space and can slow performance of database inserts, updates, and deletes.
Indexes are only available in extractions of type Synchronization and Consolidation.
Adding Indexes
To create an additional index after adding a table:
-
On the Extractions page, click the table link in the Tables column for an extraction of type Consolidation or Synchronization.
-
On the Tables page, click the link in the Index column.

-
On the Index page, click Add.

-
In the Add Index dialog box :

-
Add an index description.
-
Select the index type.
-
Specify if the index is unique.
-
Add fields by clicking the + icon. Refer to the table below for details.
-
Click Add.
-
-
Click Save.


| Setting | Description |
|---|---|
|
Type (SQL Server only)
|
|
| Unique |
Unique indexes are indexes that help maintain data integrity by ensuring that there are no rows of data in a table with identical key values. To enable this property, click the check box. Note: A Columnstore index cannot be set as Unique. |
| Fields |
Identifies the number of fields created in the index. The order of the fields will be the order in the database. Only synchronized fields are available to choose from in the drop-down list. A field cannot be used in an index twice.
Note: The maximum number of fields that can be added is 32 for a Synchronization and 31 for a Consolidation. |
| List of fields | Provides the list of selected fields. |
Building indexes in the destination
-
Select an extraction of type Consolidation or Synchronization.
-
For a Consolidation, perform a Validate and Build with the Drop the previously created object /Indexes option selected.
For a Synchronization:
-
Perform a Validate and Build with the Drop the previously created object /Indexes option selected.
-
Perform a Run Extraction Now in Truncate and Load mode.
-
New indexes will be created and existing indexes will be modified.
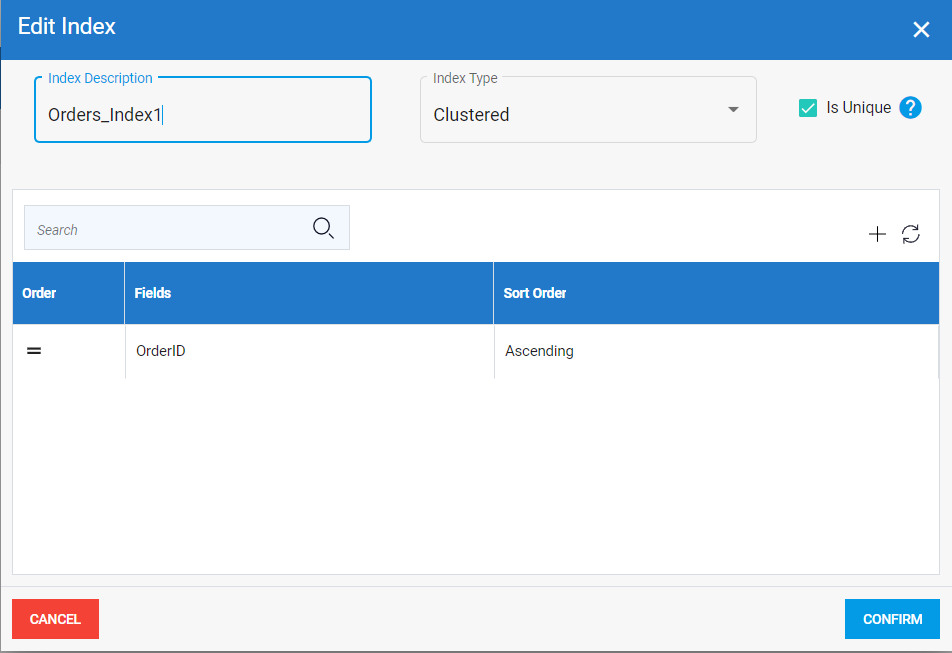
Updating Indexes
To update an index:
-
Click the table link in the Tables column for an extraction of type Consolidation or Synchronization.
-
Click the link in the Index column.
-
Click Edit on the toolbar.
-
Make the required changes.
-
Click Confirm.
-
Click Save.
To add a newly-created index or update an existing index without reloading all the data:
-
Select an extraction of type Consolidation or Synchronization.
-
Perform a Validate and Build with the Only Add Missing Tables/Fields/Indexes option selected.
New indexes will be created and existing indexes will be modified.
During the Validate and Build process, you may encounter a timeout error when creating new indexes on an existing table with a lot of data. However, the query is still running in the backend and the updates can be viewed in the Logs page. If you wish to avoid the display of this error, increase the requestTimeout parameter in the web.config file of DataSyncAPI.

Deleting Indexes
To delete an existing index:
-
Click the table link in the Tables column for an extraction of type Consolidation or Synchronization.
-
Click the link in the Index column.
-
Select the index.
-
Click Delete in the toolbar.
-
Click Confirm.
-
Click Save.
To delete an index that was created in a destination database:
-
Delete it from DataSync as described above.
-
Run a Validate and Build with the Only Add Missing Tables/Fields/Indexes option selected. Indexes that were deleted in DataSync will be deleted from the destination table.